 Waiting for a file to arrive before a job can start processing it is the most common and quintessential requirement for any workload automation tool. Historically, this was done by creating a File dependency using OPENS and Unix tricks to manage wild cards and multiple matching files. Then Event Driven Workload Automation was introduced where an Event Rule could monitor a file with wild cards and when the condition was satisfied the dependent Job Stream was submitted. With the advent of the Start Condition feature introduced in version 9.4 Fix Pack 1, the event rule file monitor capability is integrated into a Job Stream using the utility, filemonitor. Another important aspect of this requirement is to pass the name of the matching file to another job in the workflow to process the data contained in the file. In order to eliminate the need to use composer and conman commands currently used on Fault-Tolerant Agents (FTA), the following new job types are also explored to perform the same activities on Dynamic Agents.
Creating a File Dependency for a Job Stream using Start Condition This section explores the feature to use a Start Condition in a Job Stream and also uses an internal variable, ListOfFilesFound, and an output file to pass the name of the matching file to a successor job in the same Job Stream. How to use the Start Condition feature with File Created Follow the steps below to create a Start Condition for a Job Stream
 How to use the Name of the File via a Variable and an Output File Follow the steps below to create a Start Condition for a Job Stream 1. Select Create New à Job Definition à UNIX 2. In the General tab, fill in the Job name, Workstation, and Login 3. In the Task tab, enter the following Script name: /bin/echo "File Monitored: ${job:FILE_CREATED.ListOfFilesFound}" 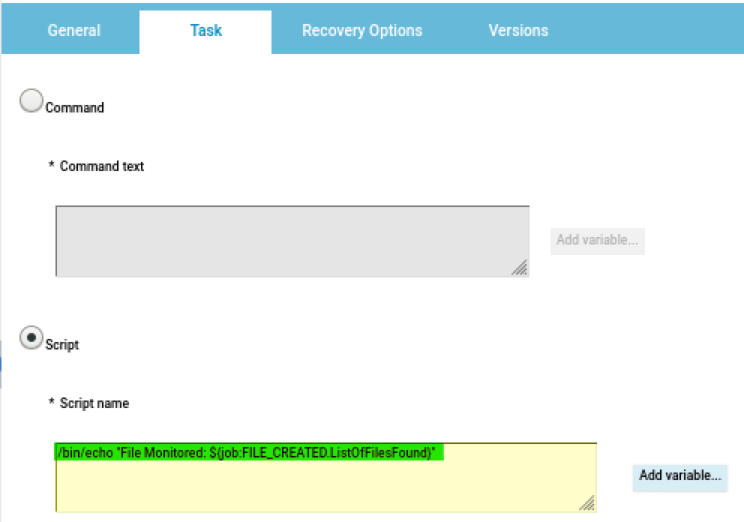 4. Click on Save 5. Select Create New à Job Definition à UNIX 6. In the General tab, fill in the Job name, Workstation, and Login 7. In the Task tab, enter the following Script name: cat /tmp/start.cond.out.txt 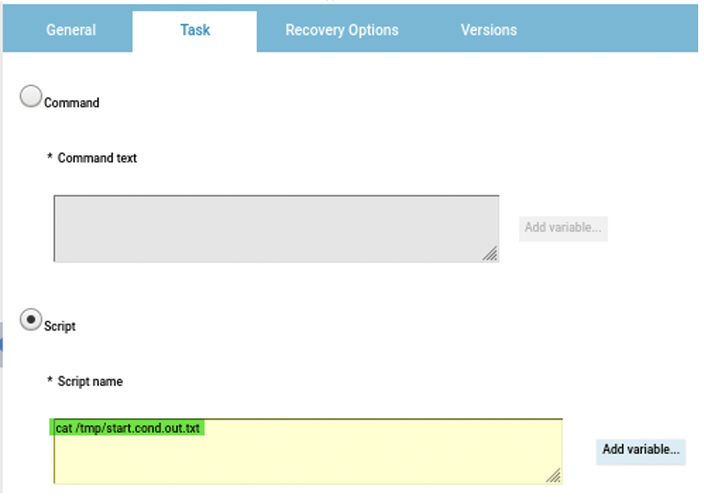 8. Click on Save 9. Add the two jobs created earlier to the Job Stream 10. Click on Save 11. The following is the Job Stream definition is composer format. SCHEDULE EEL#START_COND_JS STARTCOND FILECREATED EEL#"/tmp/start.cond.*.txt" INTERVAL 60 ( ALIAS FILE_CREATED RERUN OUTFILE "/tmp/start.cond.out.txt" ) : EEL#FILE_NAME_FROM_VARIABLE SCRIPTNAME "/bin/echo \"File Monitored: ${job:FILE_CREATED.ListOfFilesFound}\"" STREAMLOGON iwadmin DESCRIPTION "Retrieve file name in Start Cond from an internal variable, ListOfFilesFound" TASKTYPE UNIX RECOVERY STOP EEL#FILE_NAME_FROM_OUTPUT_FILE SCRIPTNAME "cat /tmp/start.cond.out.txt" STREAMLOGON iwadmin DESCRIPTION "Retrieve file name in Start Cond from the Output file field" TASKTYPE UNIX RECOVERY STOP FOLLOWS FILE_NAME_FROM_VARIABLE END 12. Select the Job Stream Name and choose Select an Action à Submit Job Stream into Current Plan Monitor the Status of Job Stream with the Start Condition and File Created Follow the steps below to monitor the status of the Job Stream
RESTART_STARTCOND Auto generated job to submit the Job Stream FILE_NAME_FROM_VARIABLE Job to retrieve the matching file from a variable FILE_NAME_FROM_OUTPUT_FILE Job to retrieve the matching file from an output file 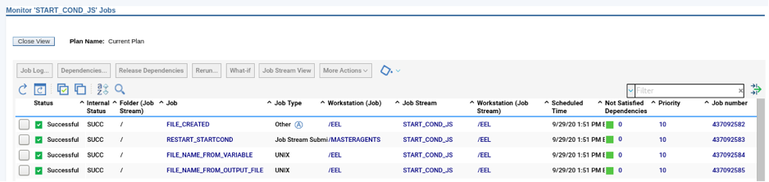 7. Left click on the Job, FILE_CREATED, to view its properties. Click on Extra Properties tab to view the internal variable that stores the name of the matching file. 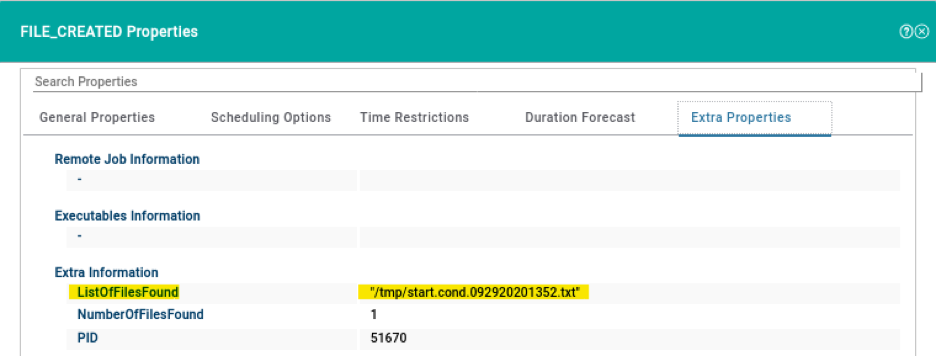 8. Right click on the Job, FILE_NAME_FROM_VARIABLE, and choose Job Log. Notice that the name of the matching file is retrieved from the internal variable, ListOfFilesFound, set by the job, FILE_CREATED, ${job:FILE_CREATED.ListOfFilesFound}. File Monitored: /tmp/start.cond.092920201352.txt 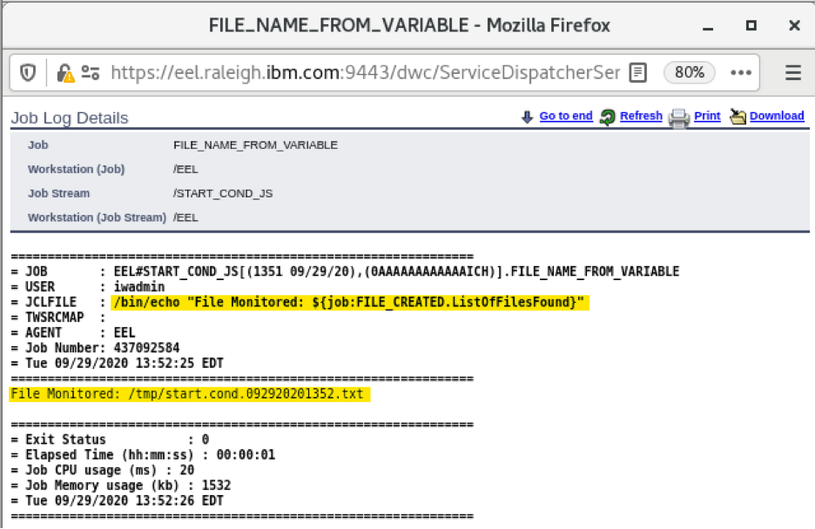 9. Right click on the Job, FILE_NAME_FROM_OUTPUT_FILE, and choose Job Log. Notice that the name of the matching file is retrieved from the file name specified in the Output file field, cat /tmp/start.cond.out.txt /tmp/start.cond.092920201352.txt 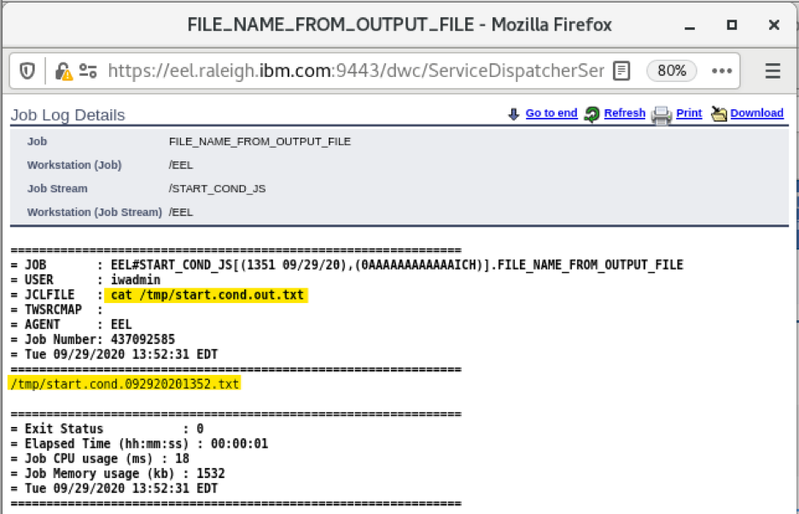 How to use the Start Condition feature with File Modified Follow the steps below to create a Start Condition for a Job Stream
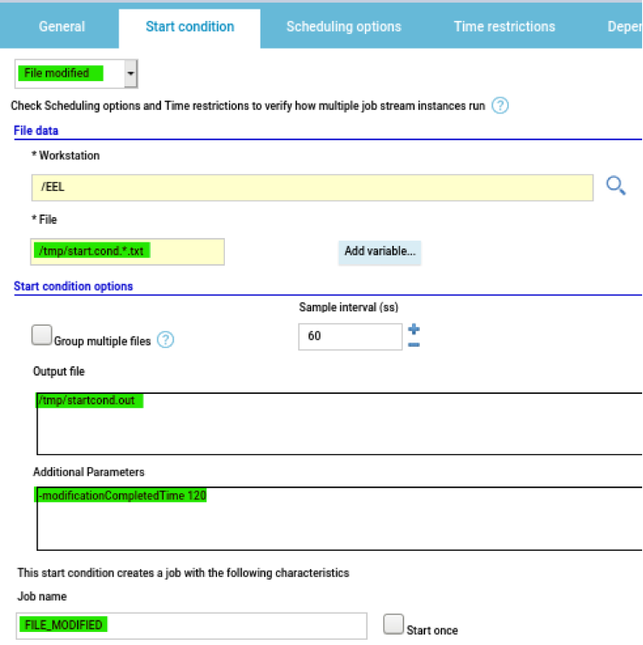 6. Select Create New à Job Definition à UNIX 7. In the General tab, fill in the Job name, Workstation, and Login 8. In the Task tab, enter the following Script name: /bin/echo "File Monitored: ${job:FILE_MODIFIED.ListOfFilesFound}" 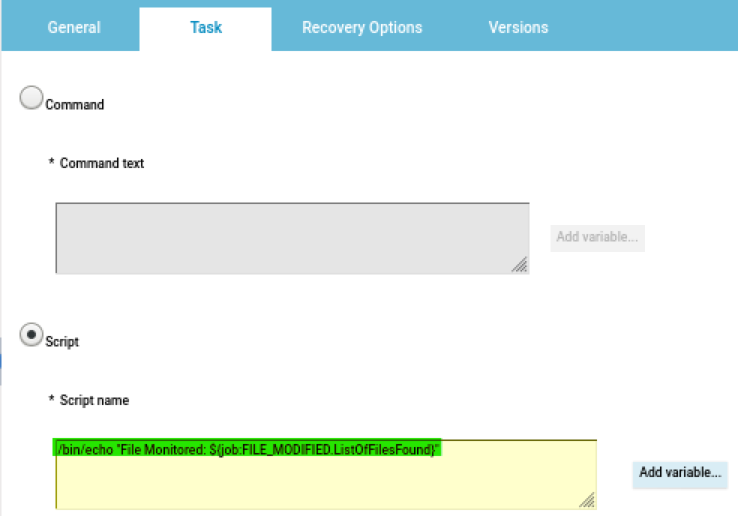 9. Click on Save 10. Select Create New à Job Definition à UNIX 11. In the General tab, fill in the Job name, Workstation, and Login 12. In the Task tab, enter the following Script name: cat /tmp/startcond.out 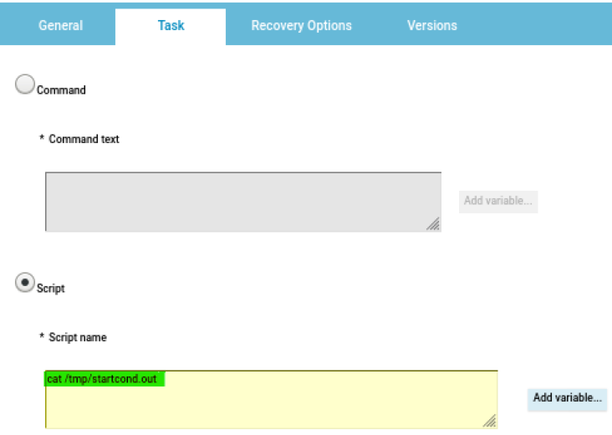 13. Click on Save 14. Add the two jobs created earlier to the Job Stream 15. Click on Save 16. The following is the Job Stream definition is composer format. SCHEDULE EEL#START_COND_JS STARTCOND FILEMODIFIED EEL#"/tmp/start.cond.*.txt" INTERVAL 60 ( ALIAS FILE_MODIFIED RERUN PARAMS "-modificationCompletedTime 120" OUTFILE "/tmp/startcond.out" ) : EEL#FILE_NAME_FROM_VARIABLE SCRIPTNAME "/bin/echo \"File Monitored: ${job:FILE_MODIFIED.ListOfFilesFound}\"" STREAMLOGON iwadmin DESCRIPTION "Retrieve file name in Start Cond from an internal variable, ListOfFilesFound" TASKTYPE UNIX RECOVERY STOP EEL#FILE_NAME_FROM_OUTPUT_FILE SCRIPTNAME "cat /tmp/startcond.out" STREAMLOGON iwadmin DESCRIPTION "Retrieve file name in Start Cond from the Output file field" TASKTYPE UNIX RECOVERY STOP FOLLOWS FILE_NAME_FROM_VARIABLE END 17. Select the Job Stream Name and choose Select an Action à Submit Job Stream into Current Plan Monitor the Status of Job Stream with the Start Condition with File Modified Follow the steps below to monitor the status of the Job Stream
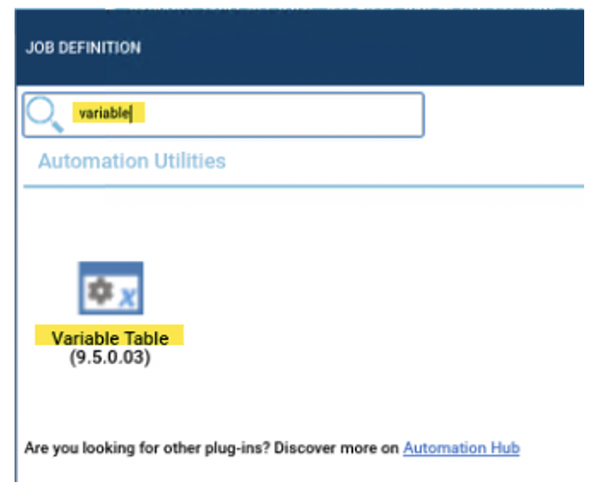
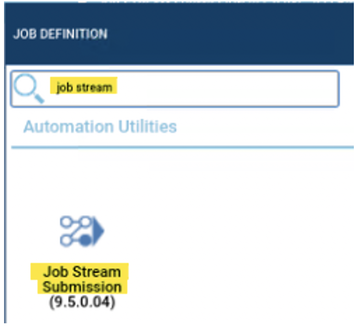
RESTART_STARTCOND Auto generated job to submit the Job Stream FILE_NAME_FROM_VARIABLE Job to retrieve the matching file from a variable FILE_NAME_FROM_OUTPUT_FILE Job to retrieve the matching file from an output file 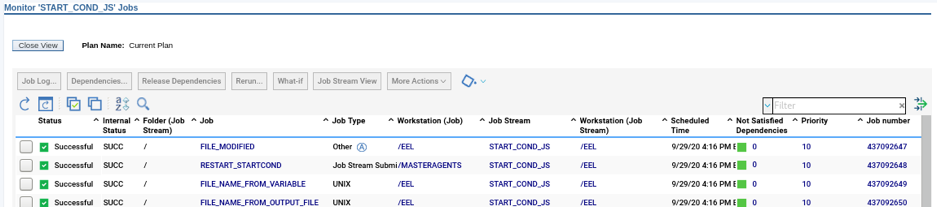 7. Left click on the Job, FILE_CREATED, to view its properties. Click on Extra Properties tab to view the internal variable that stores the name of the matching file. 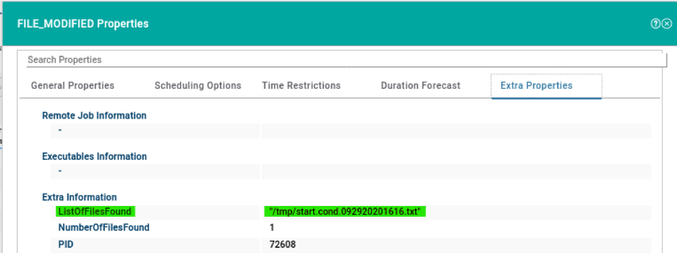 8. Right click on the Job, FILE_NAME_FROM_VARIABLE, and choose Job Log. Notice that the name of the matching file is retrieved from the internal variable, ListOfFilesFound, set by the job, FILE_CREATED, ${job:FILE_MODIFIED.ListOfFilesFound}. File Monitored: /tmp/start.cond.092920201352.txt 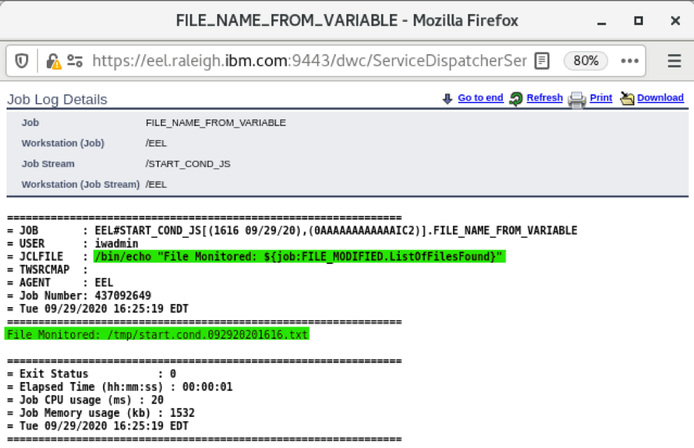 9. Right click on the Job, FILE_NAME_FROM_OUTPUT_FILE, and choose Job Log. Notice that the name of the matching file is retrieved from the file name specified in the Output file field, cat /tmp/start.cond.out.txt /tmp/start.cond.092920201352.txt 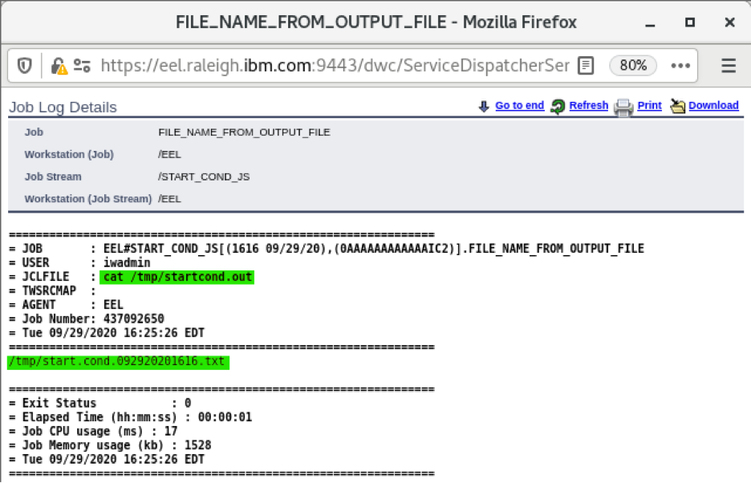 Create a Variable Table job type to update a Variable with the name of the file monitored Follow the steps below to create a job to update a Variable in a Variable Table with the name of the File that was monitored via the Start Condition.
 4. Fill in the Name, Workstation, Description, and click on Variable resolution at runtime fields as shown below. 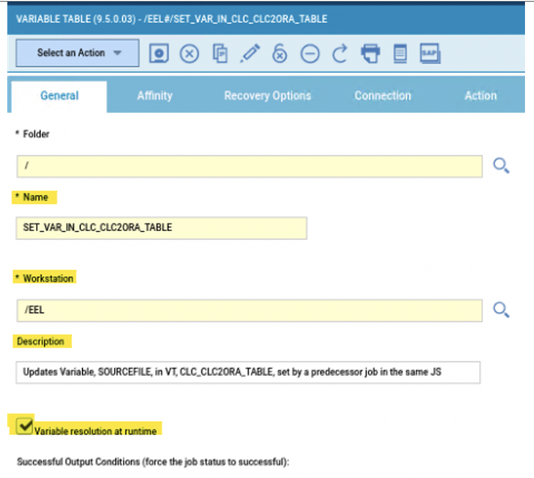 5. Click on the Connection tab and fill in the information to connect to the MDM as shown below. 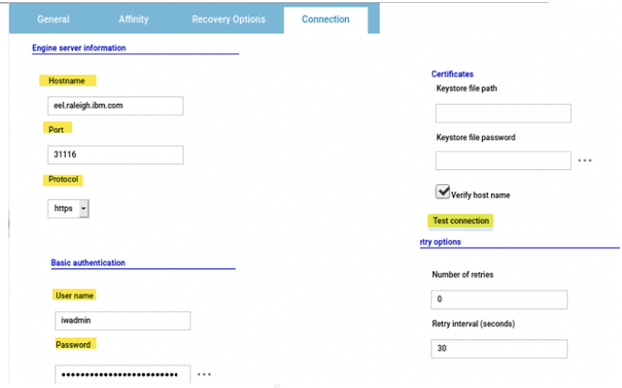 6. Click on Test Connection to verify the URL, Port, and credentials for the MDM. 7. Click on the Action tab and fill in the fields as shown below. Variable Table: The name of the Variable Table where the variable needs to be updated CLC_CLC2ORA_TABLE Name: The name of the Variable to be updated SOURCEFILE Value: The contents of the output file from the Start Condition $(cat /tmp/startcond.out) Note that the variable, ${job:FILE_MODIFIED.ListOfFilesFound}, can’t be used in this scenario as the value contains double quotes around the file name, which results in two sets of double quotes, which is not supported in a Variable definition. 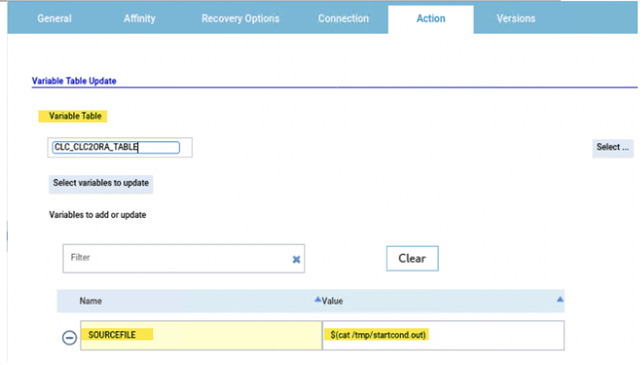 8. Click on Save. Create a Submit Job Stream job type to submit a Job Stream that retrieves the name of the file monitored Follow the steps below to create a job to update a Variable in a Variable Table with the name of the File that was monitored via the Start Condition.
 4. Fill in the Name, Workstation, Description, and click on Variable resolution at runtime fields as shown below. 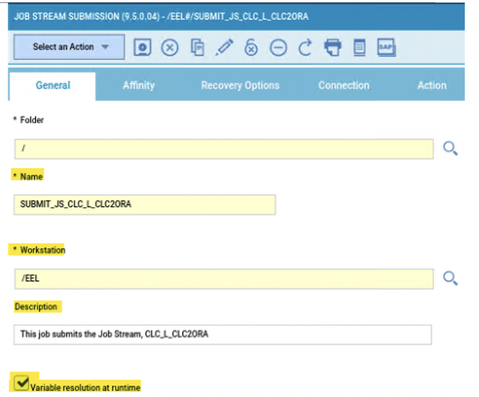 5. Click on the Connection tab and fill in the information to connect to the MDM as shown below. 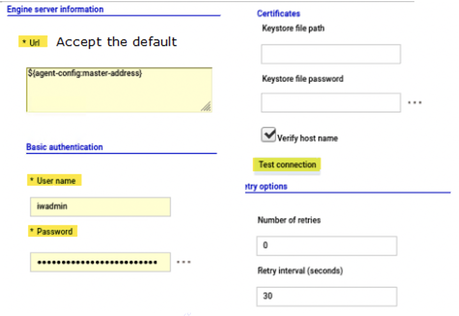 6. Click on Test Connection to verify the URL, Port, and credentials for the MDM. 7. Click on the Action tab and fill in the fields as shown below. Workstation: The name of the Workstation where the Job Stream is defined Job Stream: The name of the Job Stream that uses the Variable set earlier Select: Validates the name of the Job Stream entered 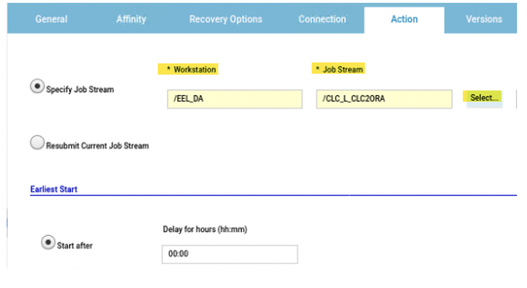 Author's Bio
0 Comments
Your comment will be posted after it is approved.
Leave a Reply. |
Archives
August 2023
Categories
All
|


 RSS Feed