 Introduction Welcome to the comprehensive user manual for the Jira Plugin. In this guide, we will explore the key concepts and functionalities of Jira, a powerful project management and issue tracking tool developed by Atlassian. Whether you are new to Jira or looking to enhance your existing knowledge, this user manual will provide you with valuable insights and instructions on how to leverage the Jira Plugin effectively. Key Concepts of Jira Jira is designed to streamline project management and issue tracking, offering a robust set of features and capabilities. Some of the key concepts of Jira include: 1.Projects: Jira organizes work into projects, which can represent various initiatives, tasks, or teams within your organization. Each project has its own set of issues and configurations. 2.Issues: Issues are the core entities in Jira and represent tasks, bugs, features, or any other unit of work. They can be customized with different fields, workflows, and permissions to suit your specific needs. 3.Workflows: Jira workflows define the lifecycle of an issue, from creation to completion. They consist of a series of steps and transitions, allowing you to track and manage the progress of your work. 4.Boards: Jira boards provide a visual representation of your project's progress and allow you to manage and prioritize issues using agile methodologies such as Scrum or Kanban. The Jira Plugin and Hosting Options: Atlassian offers two hosting options for Jira: Jira Cloud and Jira Server. If you choose Jira Cloud, Atlassian will host and set up your Jira Software site in the cloud, providing a hassle-free and accessible solution. On the other hand, Jira Server allows you to host and manage Jira on your own infrastructure. The Jira Plugin supports both hosting options, allowing you to seamlessly integrate the plugin into your preferred Jira environment. Whether you opt for a cloud domain or an owner domain, the Jira Plugin ensures a consistent and enhanced experience for your project management and issue tracking needs. For Jira Server, the plugin supports versions 8.0.0 onward, ensuring compatibility with the latest releases. Jira for Different Teams Jira caters to various teams and departments, offering specialized solutions tailored to their specific needs. For example: 1.Jira Work Management: Designed for business teams, Jira Work Management provides a user-friendly interface and features that streamline task management, collaboration, and reporting, enabling teams to effectively organize and track their work. 2.Jira Service Management: Specifically tailored for IT service teams, Jira Service Management offers robust ITIL (IT Infrastructure Library) functionalities, allowing organizations to deliver exceptional IT services, manage incidents, and resolve problems efficiently. 3.Jira Software: Built to support software development teams, Jira Software provides a comprehensive suite of agile project management tools, enabling teams to plan, track, and release software effectively. It integrates seamlessly with popular development tools and methodologies. By aligning Jira with the specific needs of your team, you can optimize your project management and collaboration processes, driving efficiency and productivity throughout your organization. In the following sections of this user manual, we will delve deeper into the functionalities and configuration options offered by the Jira Plugin. Stay tuned for detailed instructions and best practices to make the most out of this powerful tool for your project management needs. Plugin Requirements To utilize the full capabilities of the Jira Plugin and effectively create and monitor issues, certain requirements need to be met. These requirements ensure that users have the necessary access and permissions within the Jira environment. Here are the key requirements for using the Jira Plugin: 1.Jira Credentials: To utilize the Jira Plugin, you need valid Jira credentials. The type of credentials required depends on the hosting option of your Jira instance. If you are using Jira Cloud, you will need an API key provided by Atlassian. In the case of a self-hosted Jira Server, you can authenticate using either your Jira password or an API key associated with your account. 2.Project Access: To create an issue using the Jira Plugin, you must have access to the project where you want to create the issue. This access is typically granted through the "Browse projects" permission, which allows you to view and navigate through different projects within Jira. Ensure that you have the necessary permissions to browse the desired project before creating an issue. 3.Monitoring Issues: If you wish to monitor an existing issue using the Jira Plugin, you need access to the project where the issue resides. Additionally, you should be aware of the issue's unique identifier, either its ID or key. This information enables you to track and monitor the specific issue within the project effectively. By meeting these requirements, you can fully leverage the capabilities of the Jira Plugin to create, monitor, and manage issues within your Jira projects. Ensure that you have the appropriate credentials and access permissions in place, considering the specific requirements based on your Jira hosting option, to make the most out of this powerful plugin and optimize your project management workflows in Jira. Plugin functionality Jira Plugin Functionalities: The Jira Plugin offers a range of powerful functionalities that enhance your ability to manage and track issues within your projects. Here are some key features provided by the Jira Plugin: 1.Create an Issue: With the Jira Plugin, you can easily create new issues within your existing Jira projects. Whether you need to raise a bug, create a task, or log a feature request, the plugin enables you to quickly and efficiently capture and document the necessary information. By providing essential details such as issue type, summary, description, and assignee, you can initiate the issue creation process seamlessly. 2.Monitor Issue/Ticket Status: The Jira Plugin allows you to monitor the status of one or multiple issues with ease. You can specify the desired status(es) to track and receive real-time updates on any changes. This functionality is particularly useful for staying informed about important issues or ensuring that critical tasks are progressing as expected. By defining the specific status(es) you want to monitor, you can effortlessly stay on top of your project's progress. 3.Update Existing Issues: The Jira Plugin empowers you to update and modify existing issues directly from your integrated environment. Whether you need to assign a new owner, add comments, update the priority, or make any other necessary adjustments, the plugin provides a convenient interface for performing these actions. This feature ensures that you have complete control over the lifecycle of your issues, enabling you to keep them up to date and reflect the most accurate information. By leveraging these functionalities, the Jira Plugin streamlines and enhances your issue management process. Whether you're creating new issues, monitoring their status, or making updates, this plugin provides a seamless integration with Jira, enabling you to efficiently handle and track your project's issues. 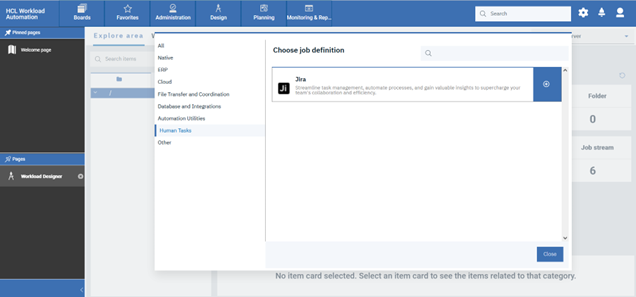 Jira Plugin Form In Jira plugin properties there are two panels: CONNECTION and ACTION 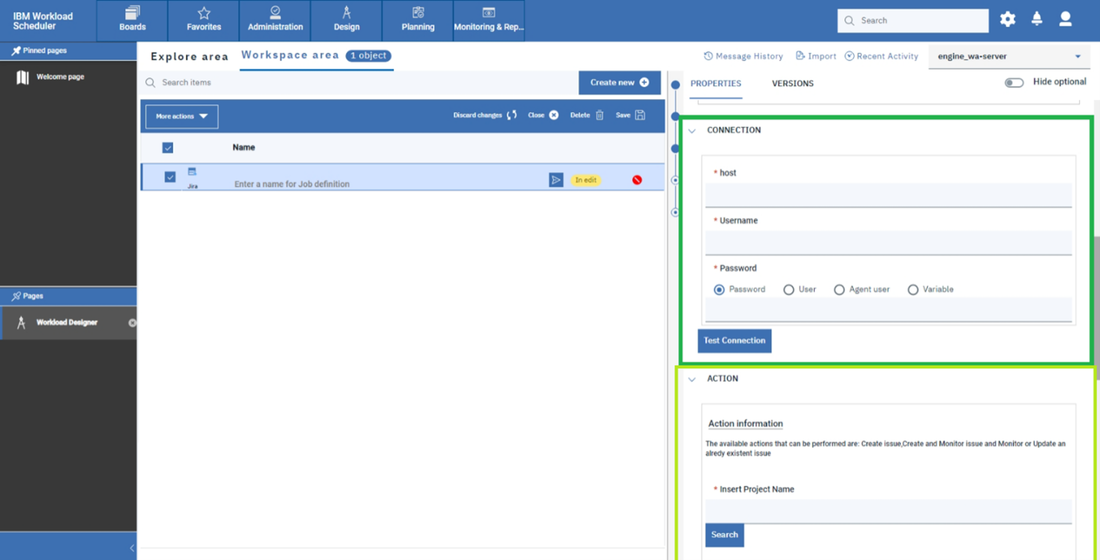 Connection In the panel CONNECTION you can enter the Jira credentials:
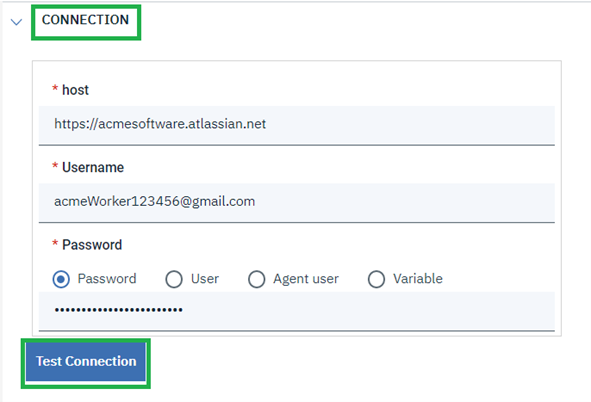 The button “Test Connection” allows you to check if the entered Jira credentials are correct, the button show a popup that shows the result of Test connection. 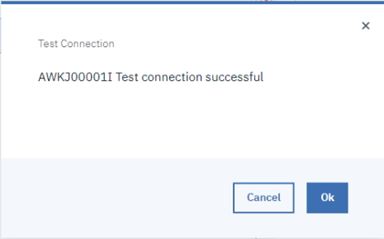 Action In the panel ACTION you can switch between three operations: Create, Monitor or Update 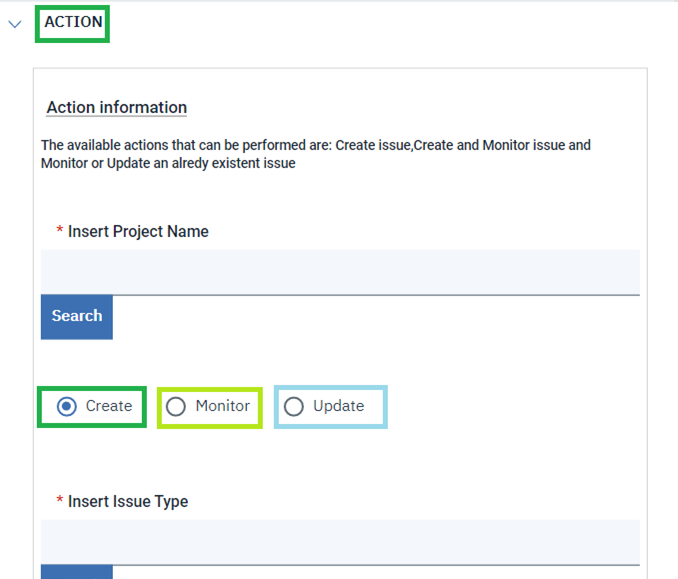
Note. For all three operation you must know and enter the project Name or Id or key. Create In the panel ACTION, if you choose Create operation, you can create a new issue. To create a new issue, the Plugin needs:
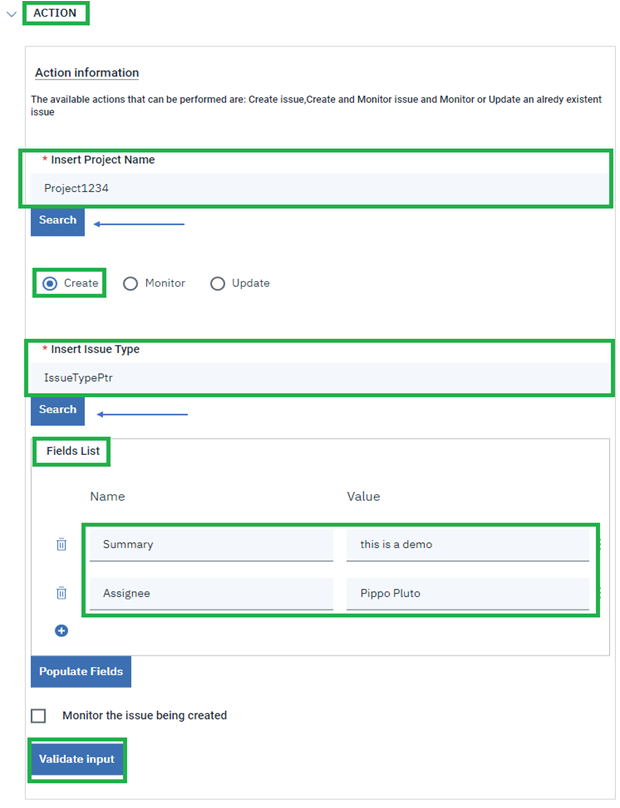 Populate Fields In the panel ACTION there is an area called Fields List where you can enter the fields that the issue makes available for create the issue.  You can enter the fields manually using the “+” button, placed below the List or in alternative use the button Populate Fields to generate all fillable fields of the issue Type entered, and insert them in the Fields List. The button Populate Fields show a pop-up where you can select between all fields available for the selected issue Type. The pre-selected fields are mandatory. 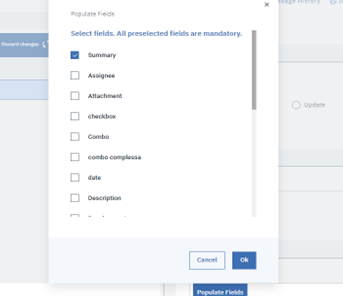 You have to pay attention to some fields type in creation mode:
Create and Monitor At the end of the panel ACTION, if you choose Create operation, there is a checkbox called Monitor the issue being created, if you selected this option, you could monitor the status of the newly created issue. For monitor the newly issue, the Plugin needs:
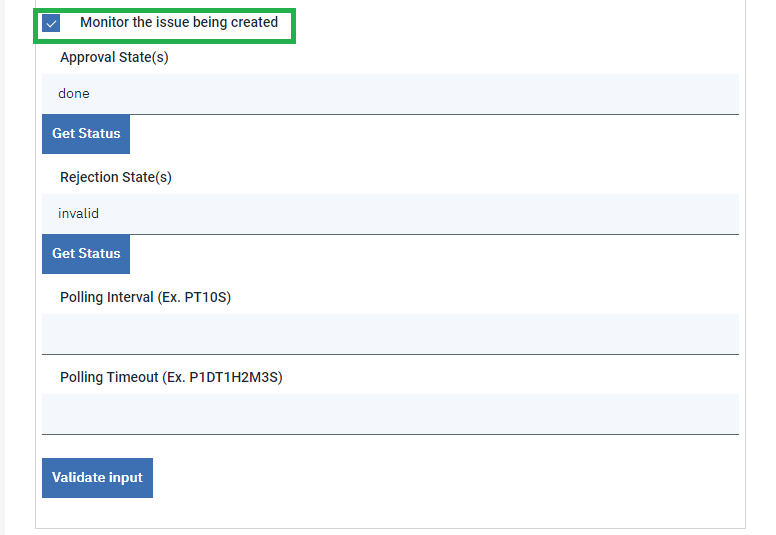 NOTE. The Status to be monitored can be entered, as in the MONITOR OPERATION, through Approval State or Rejection State, or both. Monitor In the panel ACTION, if you choose Monitor operation, you can monitor the status of an issue. To monitor the status of an issue, the plugin needs:
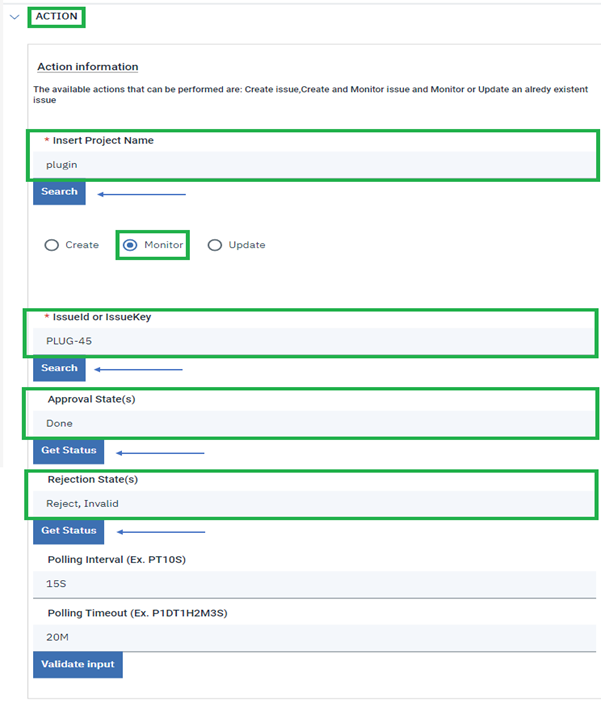 NOTE. The Status to be monitored can be entered in Approval State or Rejection State, or in both.
Polling Interval and Polling Timeout The two fields in Monitor operation called Polling Interval and Polling Timeout don’t have to be filled. By defaults “Polling Interval” is 30 seconds while “Polling Timeout” is one day (24 hours). If you want to insert a specific value for this field you can following the current syntax:
Status achieved. The monitoring of an issue is stopped when: 1. The issue enters either the Approval or Rejection state, depending on the status provided. 2. The field "resolution date" is filled since the issue has reached a final status and is therefore closed. 3. There is no longer a polling timeout. Update In the panel ACTION, if you choose Update operation, you can perform a Transition for the specified issue and update all editable fields of the issue inserted. For update the exist issue, the Plugin needs:
Fields to update, if you want change the status, you have to perform a transition (you have to enter the “transition” fields and the relative name or id of the transition to perform). All fields editable are listed in the list that opens when click on the button Populate Fields 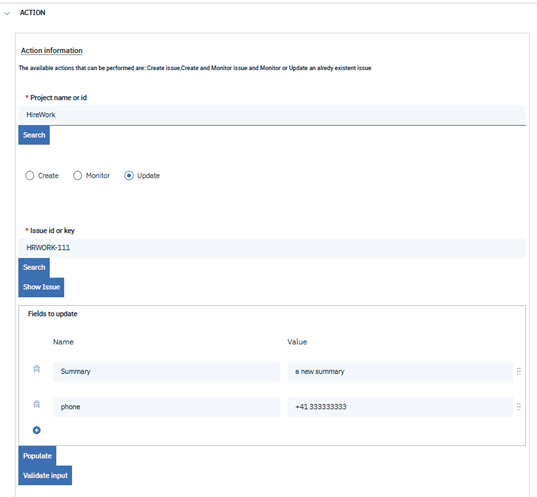 The button Populate Fields to Update working as the button in Create operation, it populates the fields List with the fields you selected and show only the editable fields of the issue selected. the button Show Issue shows a pop up with all editable name-value pairs set in the issue selected. 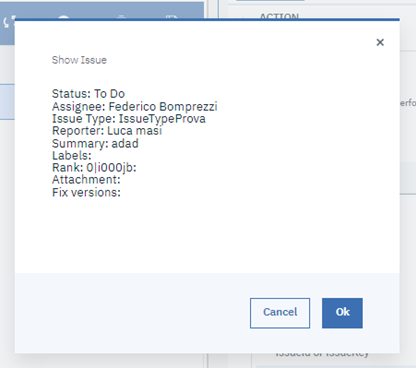 Note. If you want to unset or cancel a value of a field previously filled you need to enter as value of the fields “unset” (as in example). Also, this operation is only in “set” mode, so all value entered will replace the value previously entered. You can’t add a value to the value that's already inserted, you need enter both (and all) value to be displays (as in example) 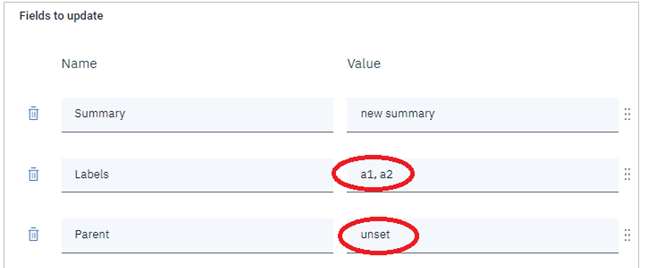 You must to pay attention to some fields type in update mode:
Validate Input The button at the end of the panel called Validate Input allows to validate all of input entered, if one of them is incorrect or missing, a popup shows the relative error, for example: 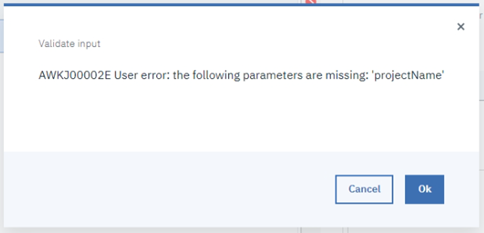 way you can be more sure that the job won't fail at runtime. Kill and Reconnect In case the server goes down, the plugin is able to resume the monitoring of an issue. In particular the plugin recover the status to monitor and the remaining polling timeout, so that the plugin can resume the monitoring of the issue without any variation. In case we choose create and monitoring, the plugin check if the issue was created: if not created, the plugin re-executes all the process, if was created, the plugin restart only the monitoring action. Output Properties The Jira Job can finish in:
In the extra properties of the job (extra information), you can find some information about issue and exit status as: Json_results contain all issue properties. 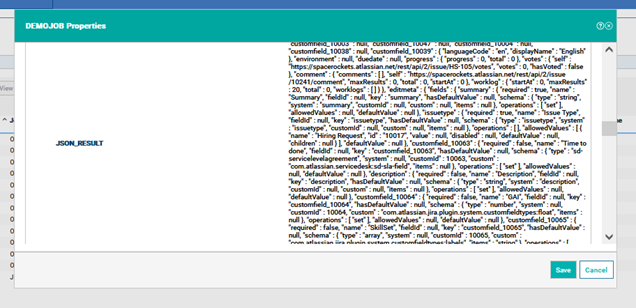
Job Properties When Jira Job is finished, you can see the “Exit Status” reached through the output of the Job Properties. In the Job Properties you can found like as Out Properties:
AUTHOR
0 Comments
Your comment will be posted after it is approved.
Leave a Reply. |
Archives
August 2023
Categories
All
|


 RSS Feed