 Starting from version 9.3 FP2, Workload Scheduler provides a set of fully functional APIs that are implemented based on Representational State Transfer (REST) services. The REST APIs are based on the same APIs used by the product user interface and provide full access to all the Workload Scheduler features, which is great! With this blog I want to show you how simple it is to access the REST APIs with the Swagger UI. Once you have installed your master domain manager or backup master domain manager, you can access the Swagger UI at the following url: https://<TWS_HOST>:<port_number>/twsd where:
The REST APIs provide services grouped in five main categories: engine, event rules, workload modelling, plans, and security. For each category you can find a list of operations that you can perform. You can also see details about the REST APIs on https://start.wa.ibmserviceengage.com/twsd/. Add Unix job to the model
Let’s start using the REST APIs with a simple example: adding the following Unix job to the model. As first step, we can list the model operations and search for one suitable for our purposes:  The POST /model/jobdefinition operation is exactly what we are looking for. 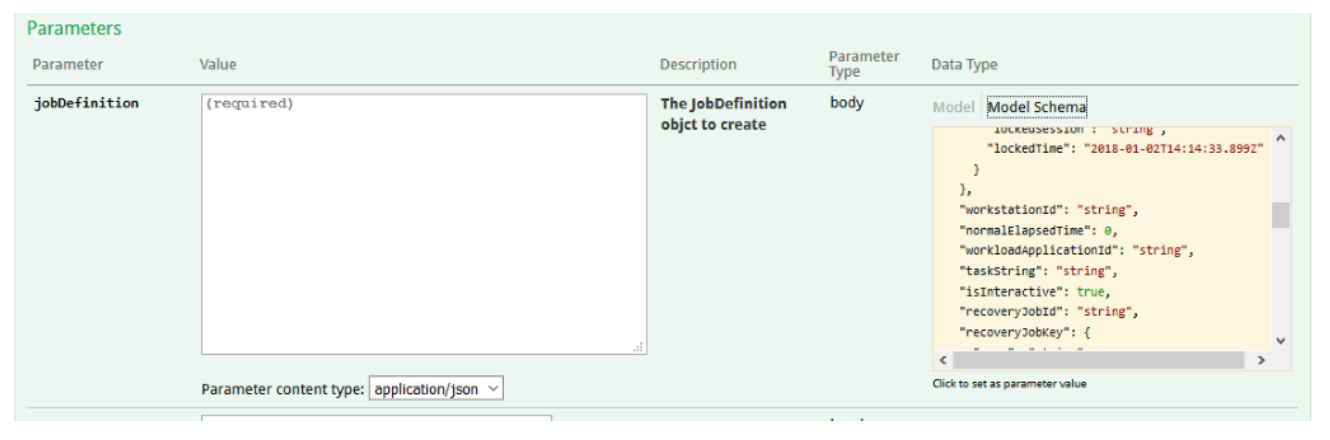 The only required parameter is the jobDefinition parameter. As we can see from the model schema, through this operation we have full access to the creation of all kinds of jobs. Before starting to write the code, we can try to use the REST APIs to become familiar with the many exposed parameters. A good starting point is the template that we can copy and paste by clicking on the model schema. Once pasted, we can click on the Model tab where we can find information about the optionality of the various parameters and, when necessary, a small explanation of each single parameter. Once removed the not necessary options, we can try the REST call via the button “Try it out!” Starting from the above job definition, here’s how to map the job definition with the object properties from the model schema:  Here is how the object appears once the parameters have been replaced: 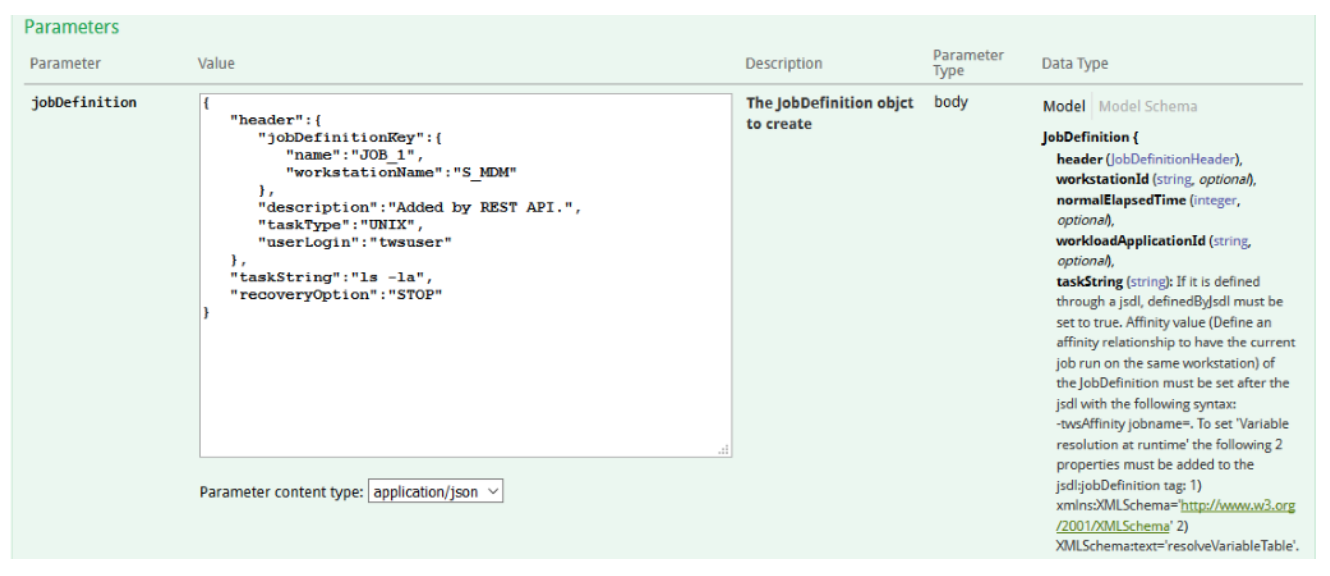 And now let’s “Try it out!” 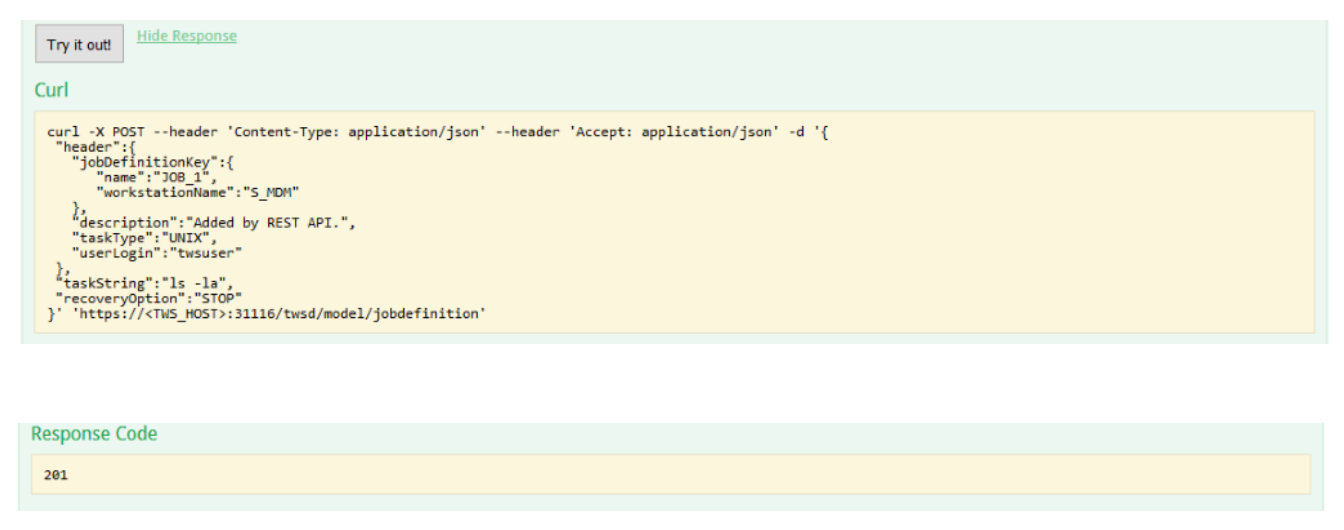 Finally, the job is added to the model. Now we are ready to write our first shell script:
Now that we have understood how to do, let's see briefly how to do a job rerun, a job stream submission, and a job submission. Rerun a job in the plan To do the job rerun, we must act on the plan, then open the list of operations related to the plan and look for the rerun: 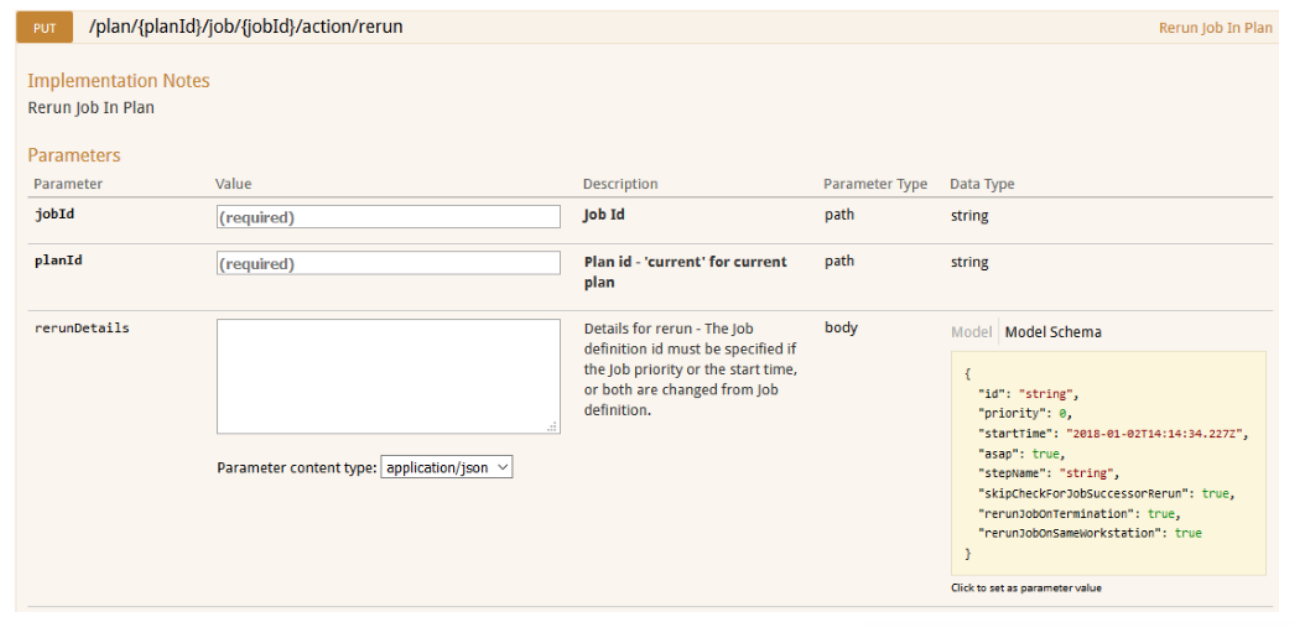 As we can see, we have only two required parameters, the plan jobid: <WORKSTATION_NAME>;<JOB_STREAM_ID>;<JOB_NAME> (you can check the job stream id via conman thru the SHOWID option) and the planid. We have just to enter these two parameters: 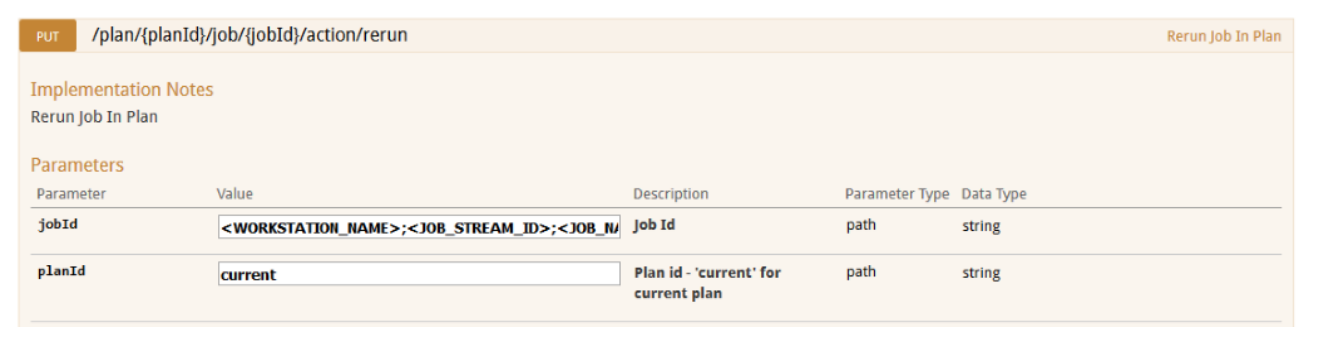 And now let’s “Try it out!” 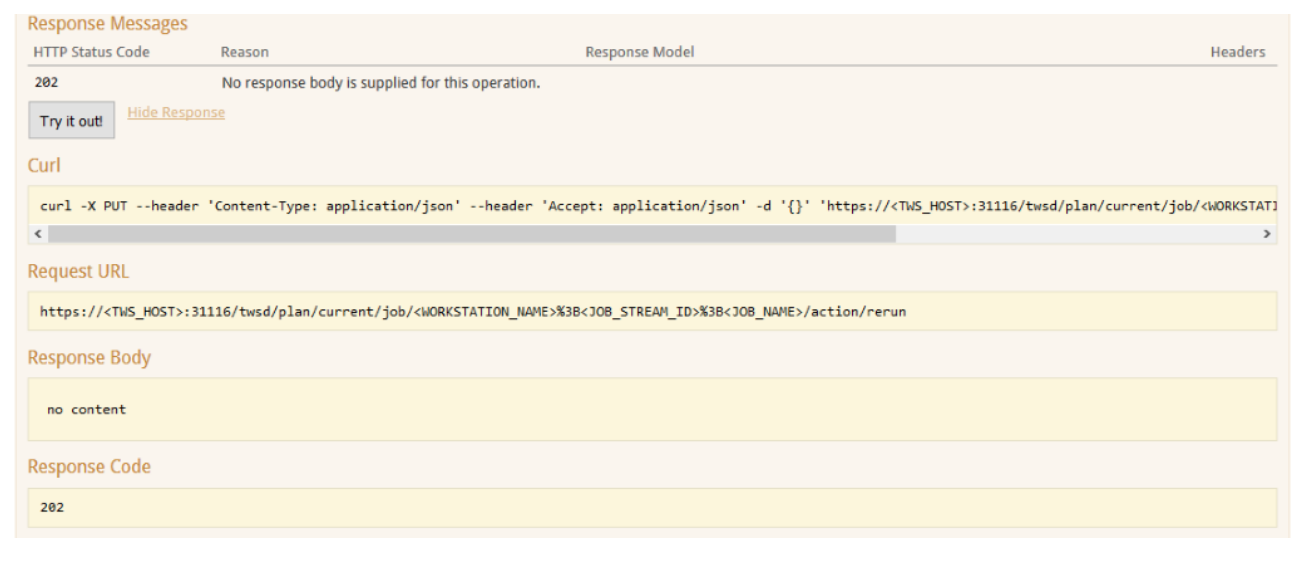 Once we have the curl call, the shell script creation is super simple! Submit a job stream in the plan To submit a job stream we must act on the plan, then open the list of operations related to the plan and look for the job stream submission: 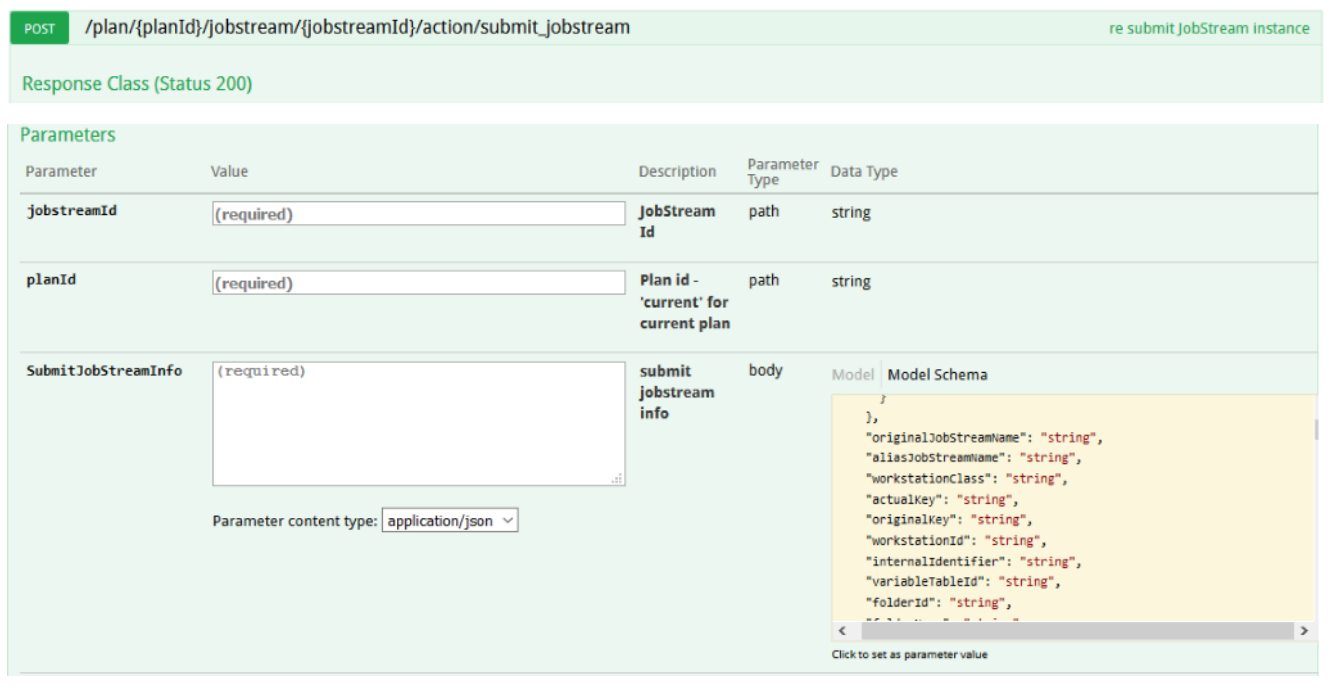 The operation has three required parameters: the jobstreamid that is the job stream internal id (we will see how to get it soon), the planId and the SubmitJobStreamInfo that allow to specify how the job stream should be submitted. In our example, we can simply add the input arrival time and the job stream alias: Job Stream
To get the jobstreamId we must run an operation on the model:  This operation has only one required parameter: How-Many that indicates how many object to retrieve. We set this parameter to one and add the optional parameter body to be sure to get just one result: 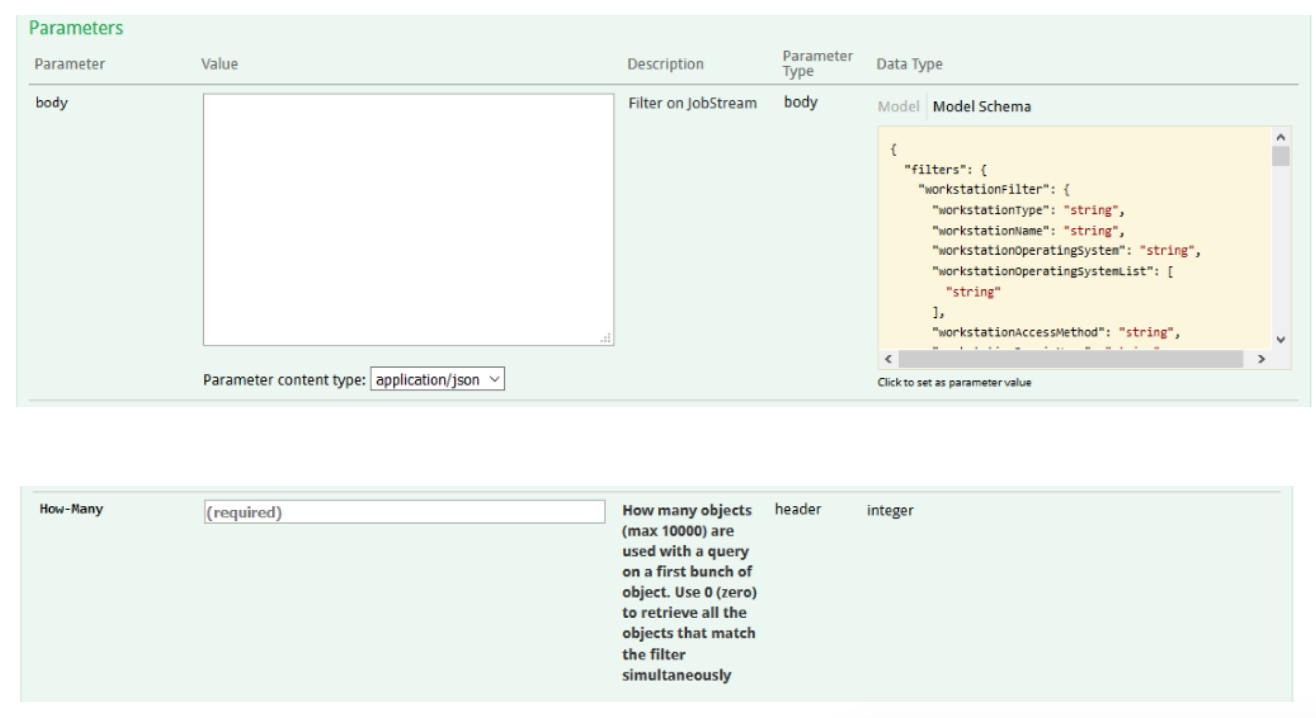 We can use the following statements to filter out the unwanted job streams: Job Stream
If needed, we can also add validFrom, validTo or validInRange options. And now let’s “Try it out!” 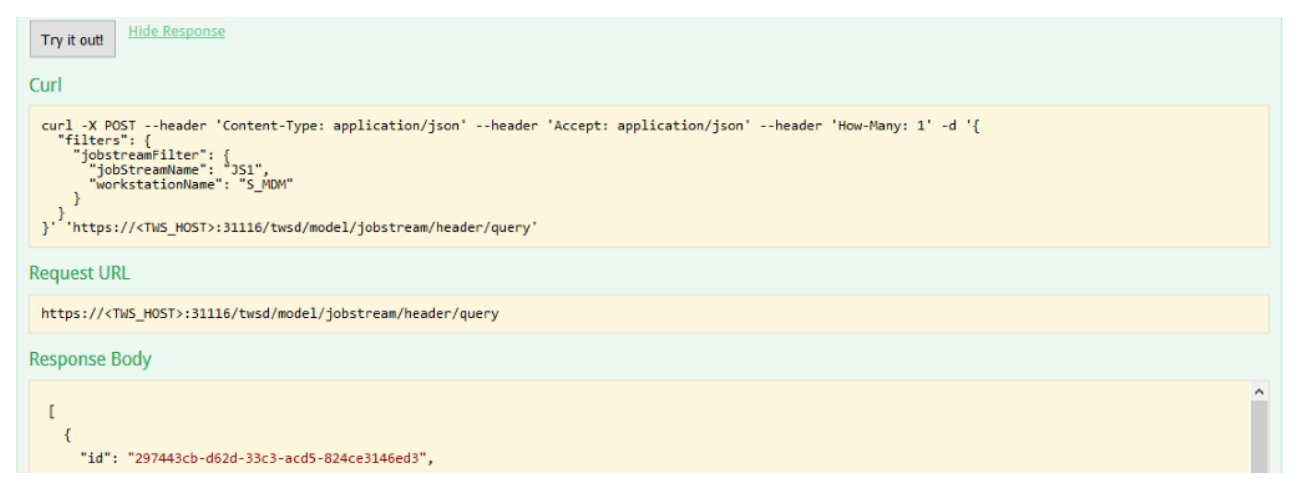 Finally, with the job stream id we can now call the job stream submission operation: 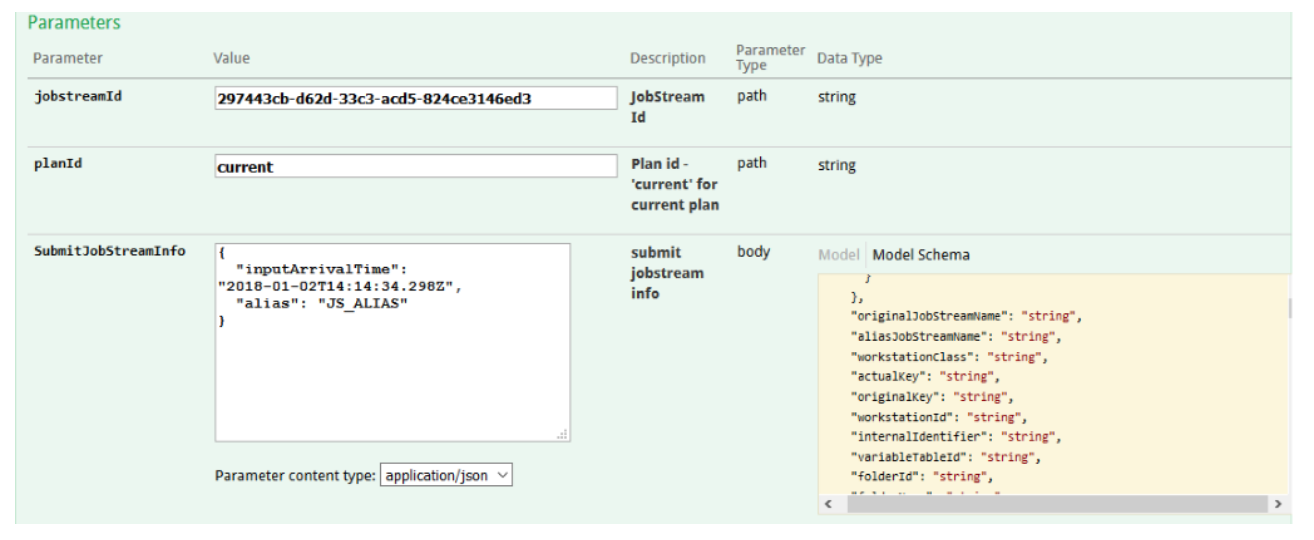 And now let’s “Try it out!” 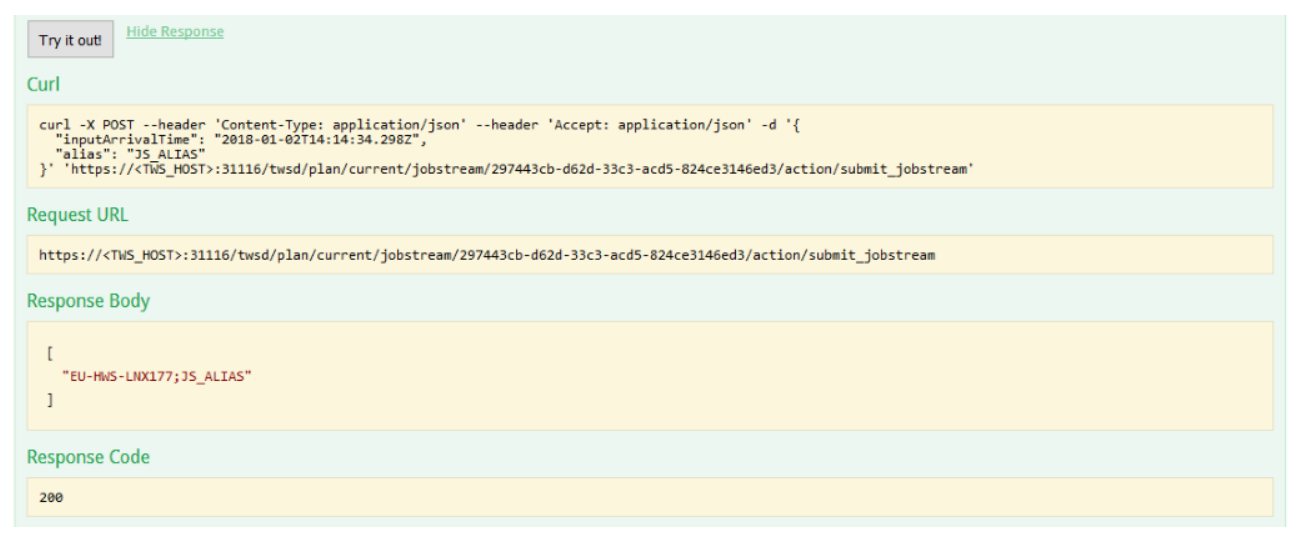 As a further automation step we can add a webhook to our job stream via a REST job. Submit a job in plan As the last example, we’ll see the job submission. This will require the use of three operations: first, we have to get the job id from the model; then, we need to get an instance of “job in plan”; finally, we can submit the job. To get the job id we need to perform an operation on the model:  As we have already seen for the job stream, this operation has only one required parameter: How-Many that indicates how many objects to retrieve. We set this parameter to one and add the optional parameter body to be sure to get just one result:  We can use the following statements to filter out the unwanted job streams: Job Stream
And now let’s “Try it out!” 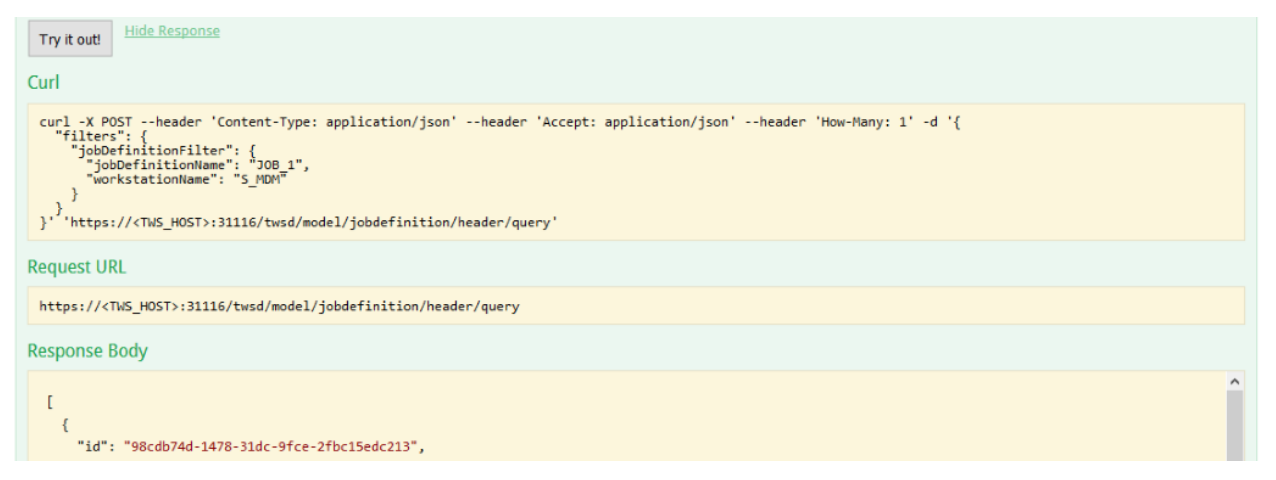 Now that we have the job id, we can get an instance of the job in plan through a plan operation:  This operation has three required parameters, the jobstreamId: <WORKSTATION_NAME>;<JOB_STREAM_ID>, the planId and the SubmitJobIntoJobStreamInfo needed to identify the job to submit. For this simple example we can use the following: Job Stream
And now let’s “Try it out!” 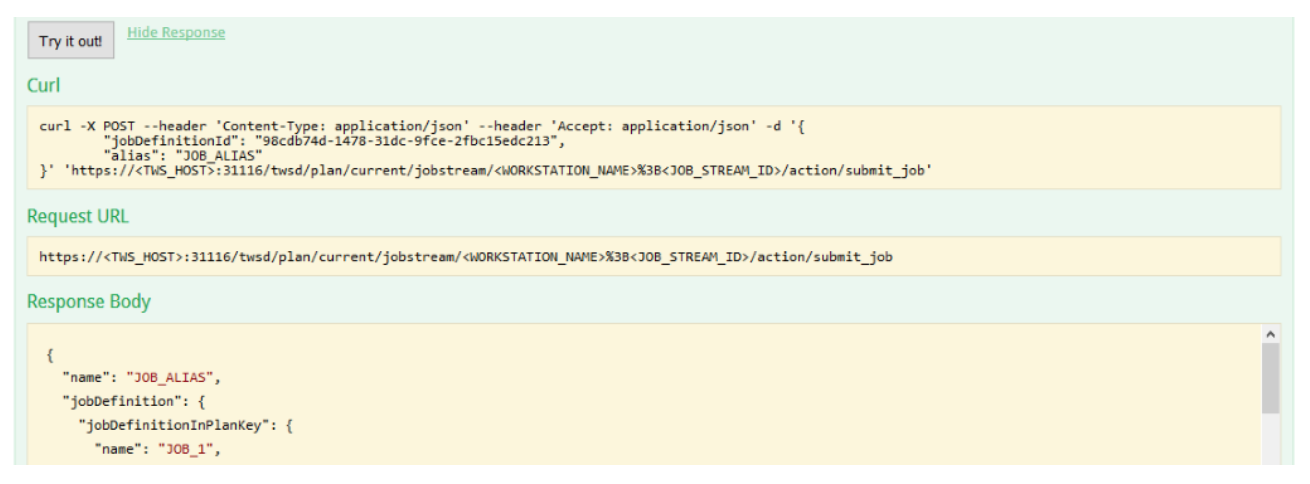 Now that we have the job in plan instance (the entire response body) we can finally submit the job. For the job submission, we must act on the plan, so let’s look in the plan to find the right operation:  For this operation, we have two required parameters, the planId and the SubmitJobInfo, namely the job in plan instance we found in the previous step: 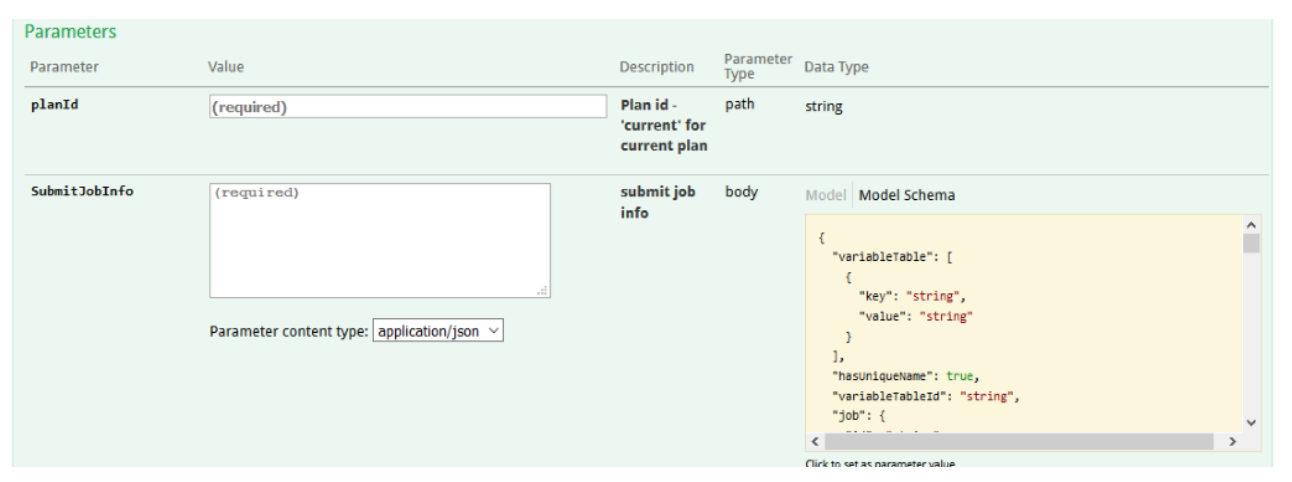 So, we can simply copy the entire response body of the previous step and paste it in the SubmitJobInfo field: Job Stream
And now let’s “Try it out!” 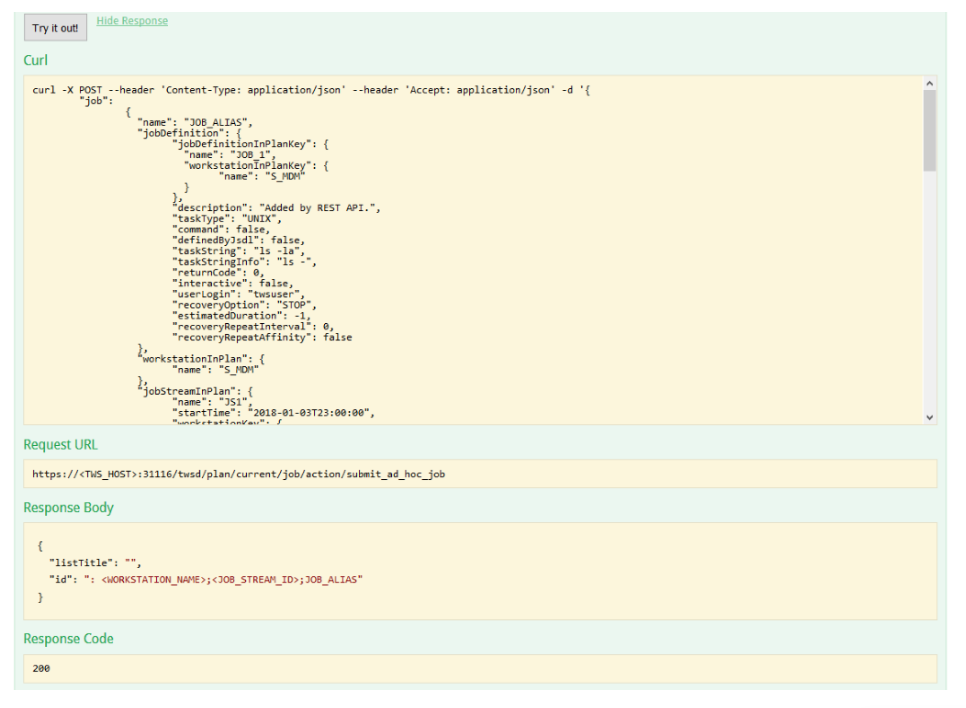 REST APIs easily integrate workload scheduling capabilities with external products and solutions. By using the Swagger UI you can find the best suitable APIs, simply and quickly. Then, you can try and test the selected REST APIs before using them into your application code. All the REST APIs examples you’ve seen in this blog can be found here: https://github.com/WAdev0/TWS_REST_API_samples If you have any feedback on this article, you can contact Gianluca Salce at [email protected] Gianluca Salce
Test Lead at HCL Gianluca works as a Test Lead at HCL Products and Platforms in Rome software development laboratory.
2 Comments
7/31/2018 11:30:24 am
Positive site, where did u come up with the information on this posting?I have read a few of the articles on your website now, and I really like your style. Thanks a million and please keep up the effective work. Your comment will be posted after it is approved.
Leave a Reply. |
Archives
July 2024
Categories
All
|
 RSS Feed