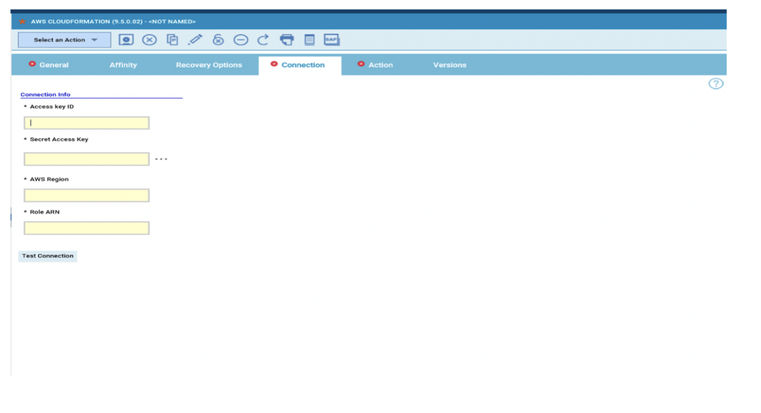
 Let us begin with understanding of AWSCloudformation what it is all about before moving to our AWSCloudformation plugin and how it is benefits to our workload automation users.  AWS CloudFormation provides a common language for you to model and provision AWS and third-party application resources in your cloud environment. AWS CloudFormation allows you to use programming languages or a simple text file to model and provision, in an automated and secure manner, all the resources needed for your applications across all regions and accounts. This gives you a single source of truth for your AWS and third-party resources. Coming to our AWSCloudformation, below diagram summarizes what is our plugin can perform, so our workload customers can make use of this to simplify their infrastructure management as well as easy to implement changes to infrastructure. 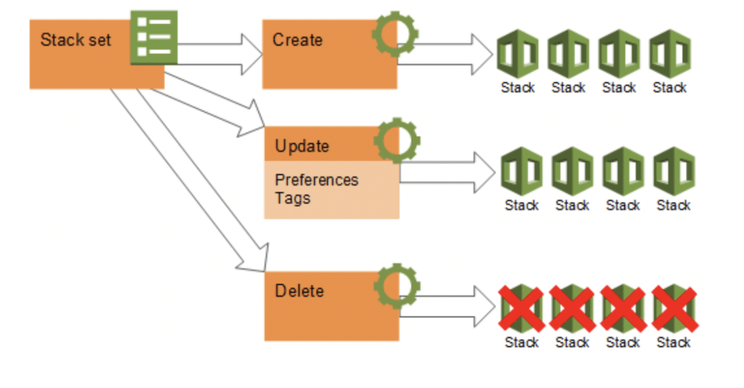 To give more clarity on its benefits let us understand with below example, For a scalable web application that also includes a back-end database, you might use an Auto Scaling group, an Elastic Load Balancing load balancer, and an Amazon Relational Database Service database instance. Normally, you might use each individual service to provision these resources. And after you create the resources, you would have to configure them to work together. All these tasks can add complexity and time before you even get your application up and running. Instead, you can create or modify an existing AWS CloudFormation template. A template describes all your resources and their properties. When you use that template to create an AWS CloudFormation stack, AWS CloudFormation provisions the Auto Scaling group, load balancer, and database for you. After the stack has been successfully created, your AWS resources are up and running. You can delete the stack just as easily, which deletes all the resources in the stack. By using AWS CloudFormation, you easily manage a collection of resources as a single unit. Let us begin with our plugin part with job definition parameters, Log in to the Dynamic Workload Console and open the Workload Designer. Choose to create a new job and select “AWSCloudFormation” job type in the Cloud section. 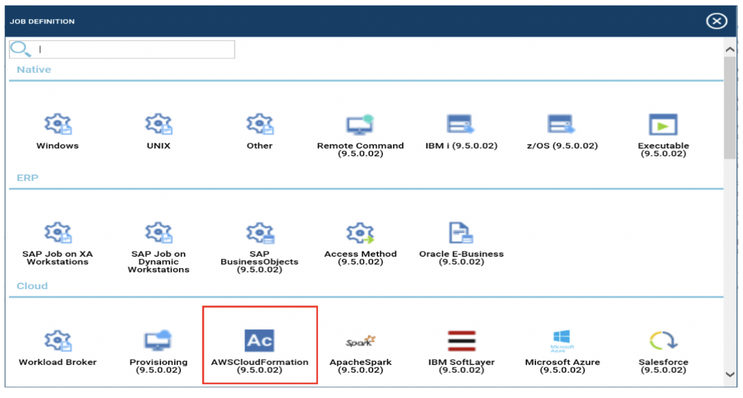 Connection Establishing connection to the AWS Cloud server: In the connection tab specify the Access Key ID ,Secret Access Key,Region and Role ARN fields to let workload Automation interact AWS Cloud Formation API(s) and click Test Connection. A confirmation message is displayed when the connection is established.
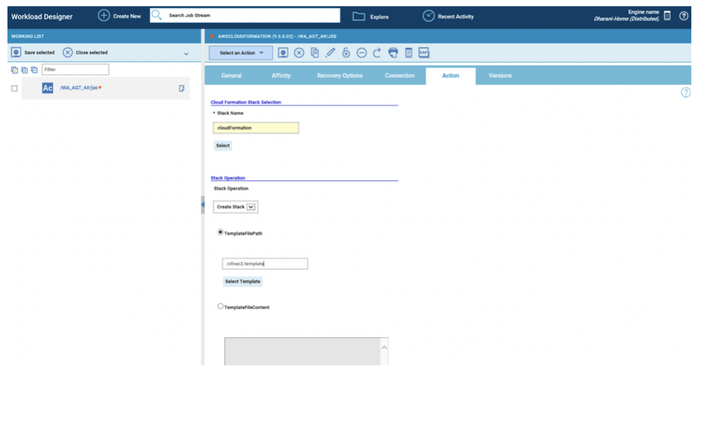
 Action In Action tab specify the stack name and stack operation which you want to perform.
 Submitting your job It is time to Submit your job into the current plan. You can add your job to the job stream that automates your business process flow. Select the action menu in the top-left corner of the job definition panel and click on Submit Job into Current Plan. A confirmation message is displayed, and you can switch to the Monitoring view to see what is going on. 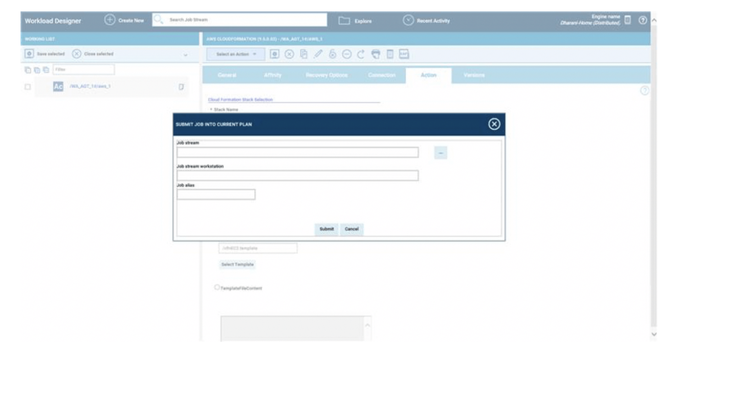 Monitor Page 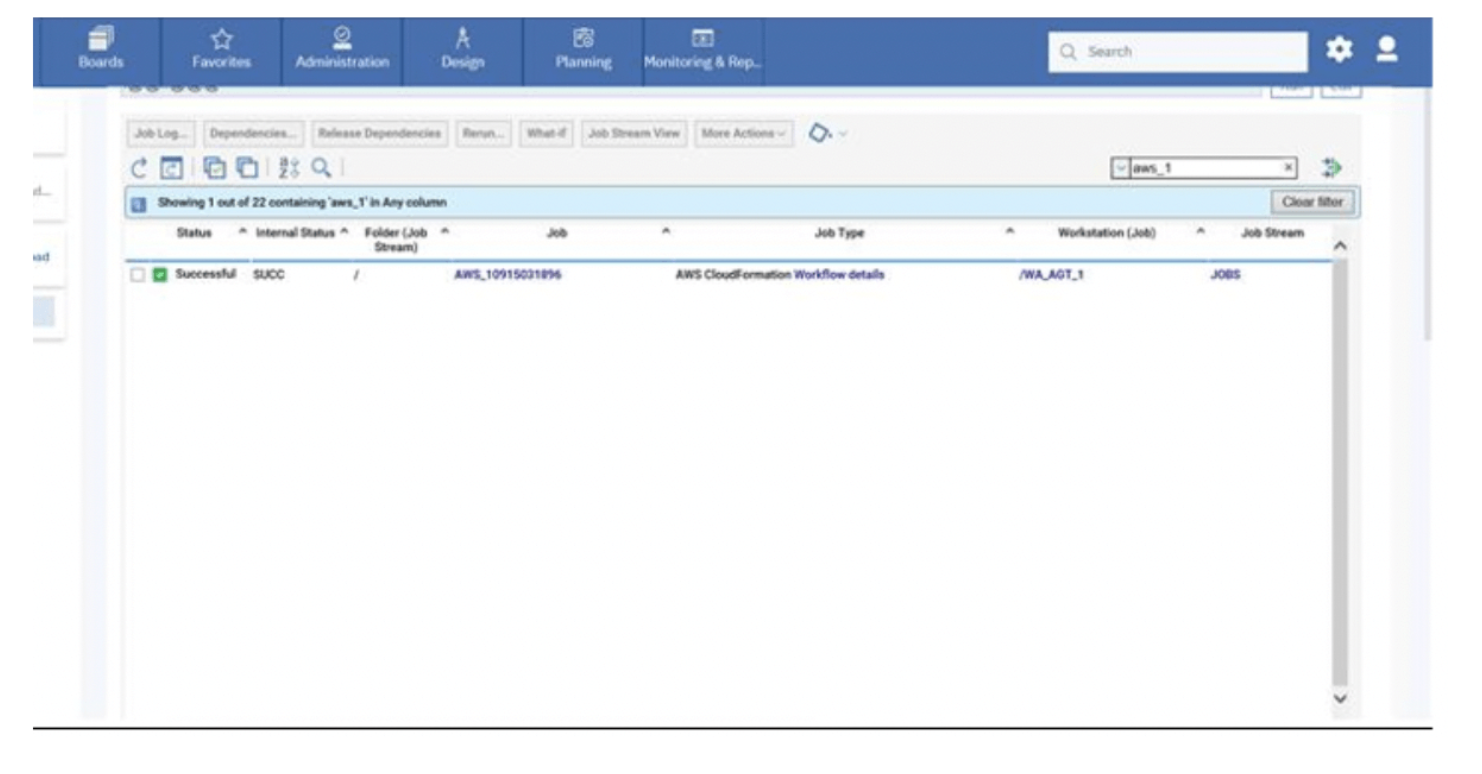 JOB LOG Details 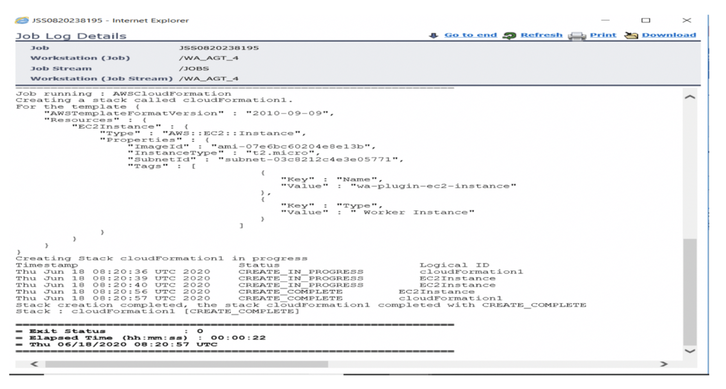 Extra Info/Properties 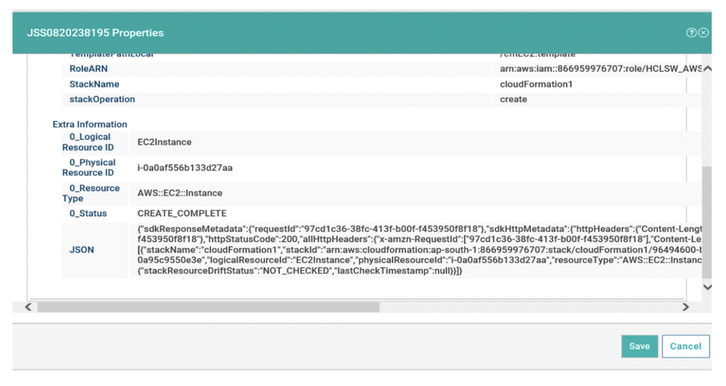 WorkFlow page 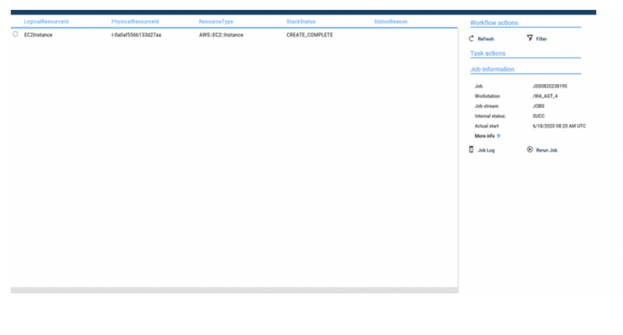 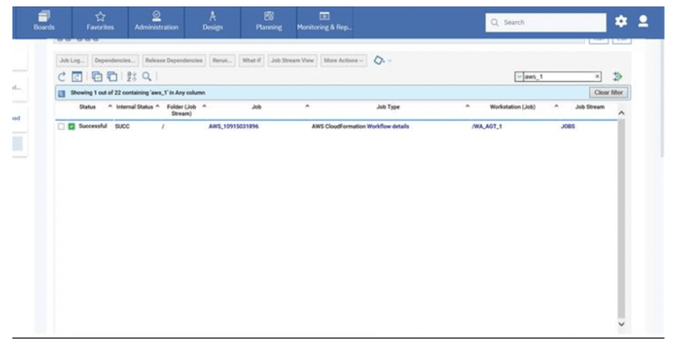 Are you curious to try out the AWSCloudFormation plugin? Download the integrations from the Automation Hub and get started or drop a line at [email protected]. AUTHOR’S BIO
0 Comments
Your comment will be posted after it is approved.
Leave a Reply. |
Archives
July 2024
Categories
All
|


 RSS Feed