 AWS Actions plug-in is a new EDWA action plugin to send events, that eliminates manual efforts and speeds up resolution greatly. It is a work management tool which offers functionalities to help the users to manage their work efficiently. Use this plugin to Send Events in AWS (SNS & SQS) when a job that matches a defined policy ends in error (Abend/Failed). It helps you monitor the solution from a single point of control. You can use the AWS Actions feature to launch a predefined action in response to events that occur on the nodes where HCL Workload Automation runs. This action sends an event on AWS server. The main elements are: • Events • Actions Events An event represents a set of circumstances that match selected criteria. Events are divided into the following major categories: HCL Workload Automation object related events All the events relating to scheduling objects such as jobs, job streams, and workstations. Note: Any change performed on a workstation referenced in a rule is not reported in the rule. For example, if you modify, update, or delete a workstation that is referenced in a rule, the rule ignores the change and continues to consider the workstation as it was when it was included in the rule. File monitoring events Events relating to changes to files and logs. File monitoring events are not supported on HCL systems. This type of event is described in more detail in File monitor. Generic events Events used to manage custom events sent by external applications. You can write an XML file to define a custom event. A schema is provided to validate your XML, as well as a basic event template that you can use as a starting point. For more information, see the schemas for generic events. Events of this category are:
Actions You can create multiple actions that send events to multiple services of AWS server (SNS & SQS). Let us learn how to use the AWS Actions action plug-in. This plug-in helps to send events based on the HCL Workload Automation object related events such as jobs, job streams, workstations. To use this plug-in, do the following things in Workload Automation:
This activity takes a short interval to deploy the newly created event rule to master domain manager. The status of an event rules can be monitored on the Manage Event Rules page. Creating event rule Login to Dynamic Workload Console and open the Design -> Create Event Rules page and create a new event rule with necessary information about the event rules. 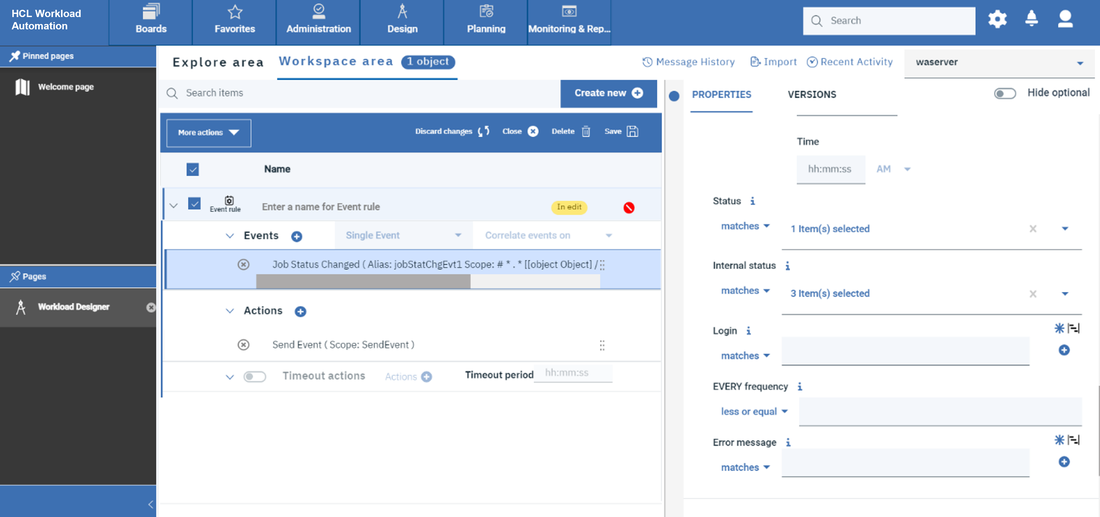 Figure 1: Create Event Rule Page Adding HCL Workload Automation plan events Every event comes with a set of predefined information from the plan. In the Add event page you can filter the required job-related information for your requirements. For example, the Job Status Changed event captures all the job-related information in the scheduler plan. You can filter the events based on the job status like FAIL/ABEND/ERROR. 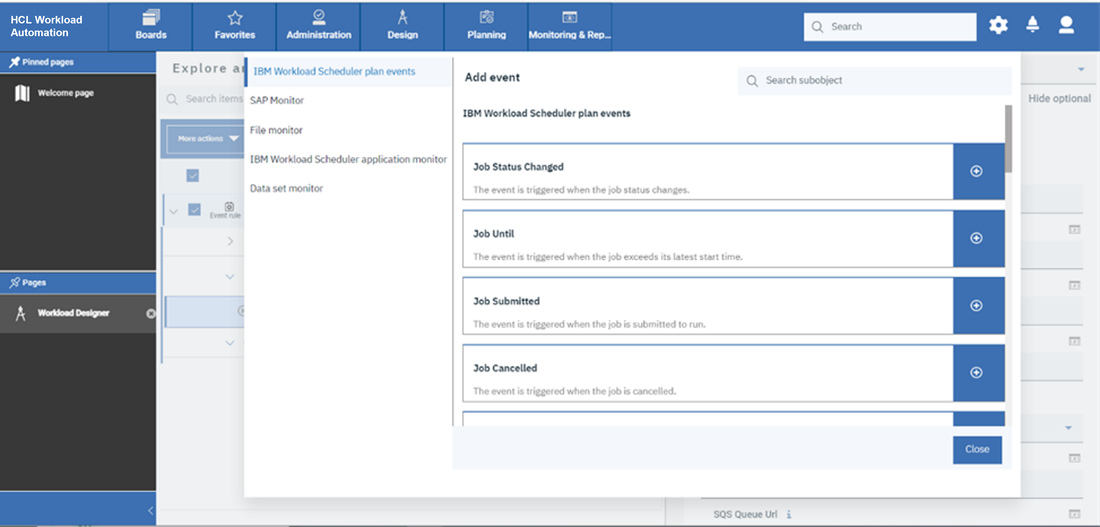 Figure 2: Add Event Page 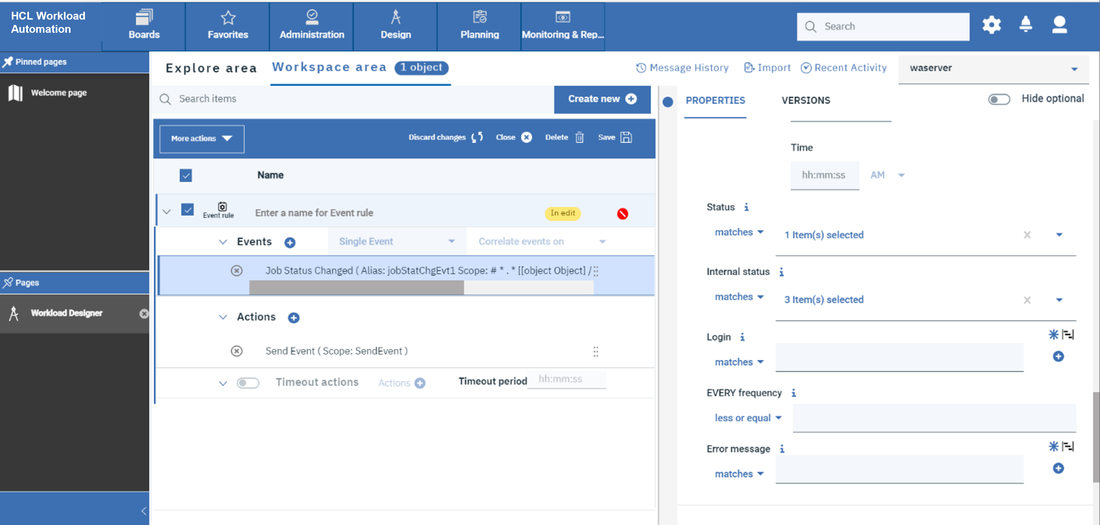 Figure 3: Add Event Page>Job Status Adding AWS Actions action In the Add Action page provide the mandatory connection related information of the AWS server like AWS Access key ID, Secret Access key, AWS region, Topic ARN if SNS service has been choose, SQS Queue URL if SQS service has been choose, Message body the message to be sent to the respective service. Apart from the mandatory information, you can also provide other required fields using Message Attributes. Note: The Message Attribute should be in the format key=value. 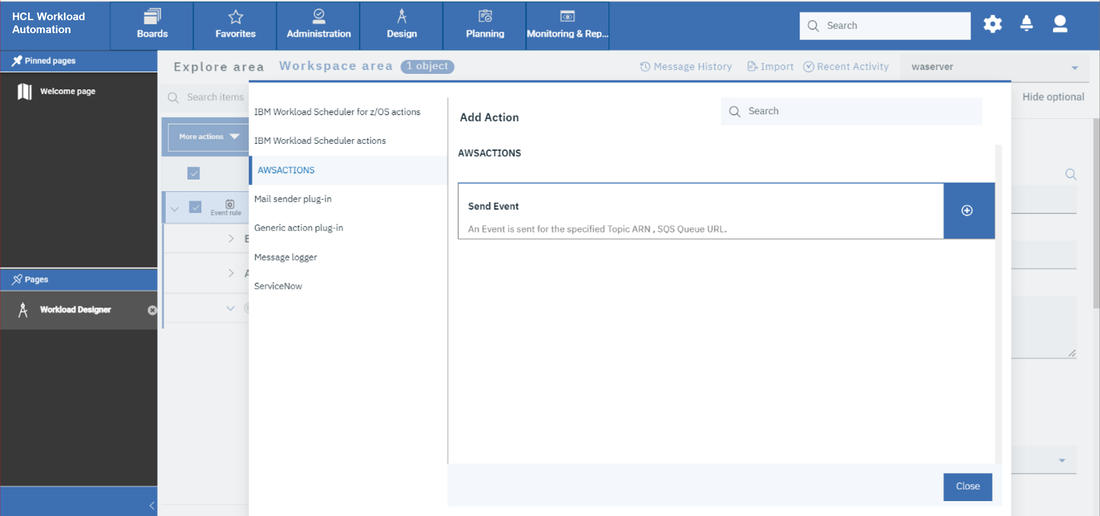 Figure 4: Add Action Page 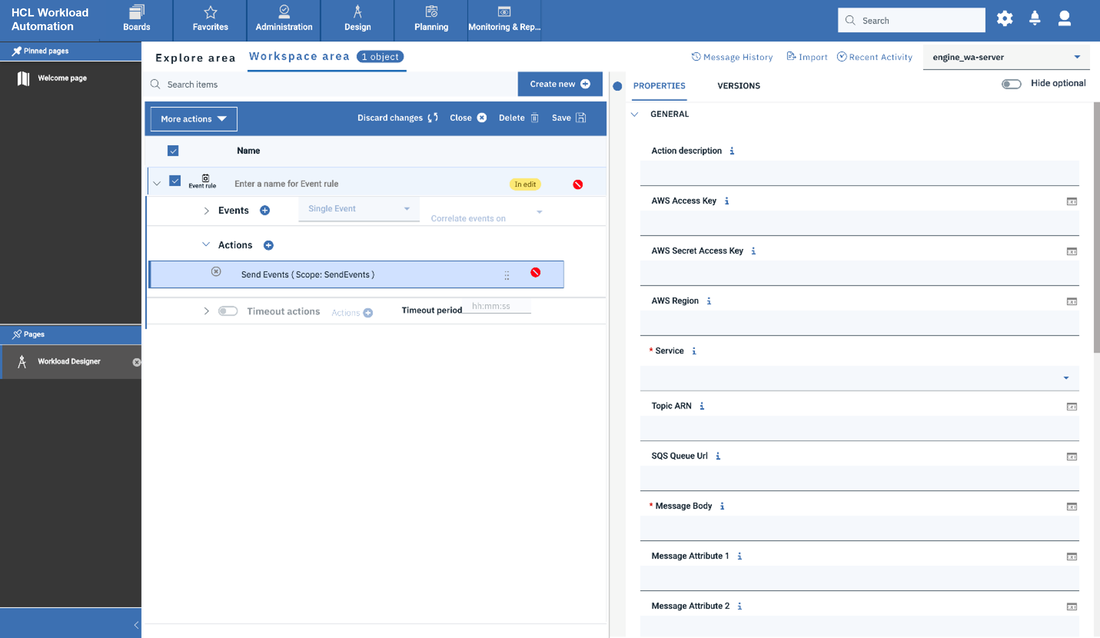 Figure 5: Add Action Page>Properties 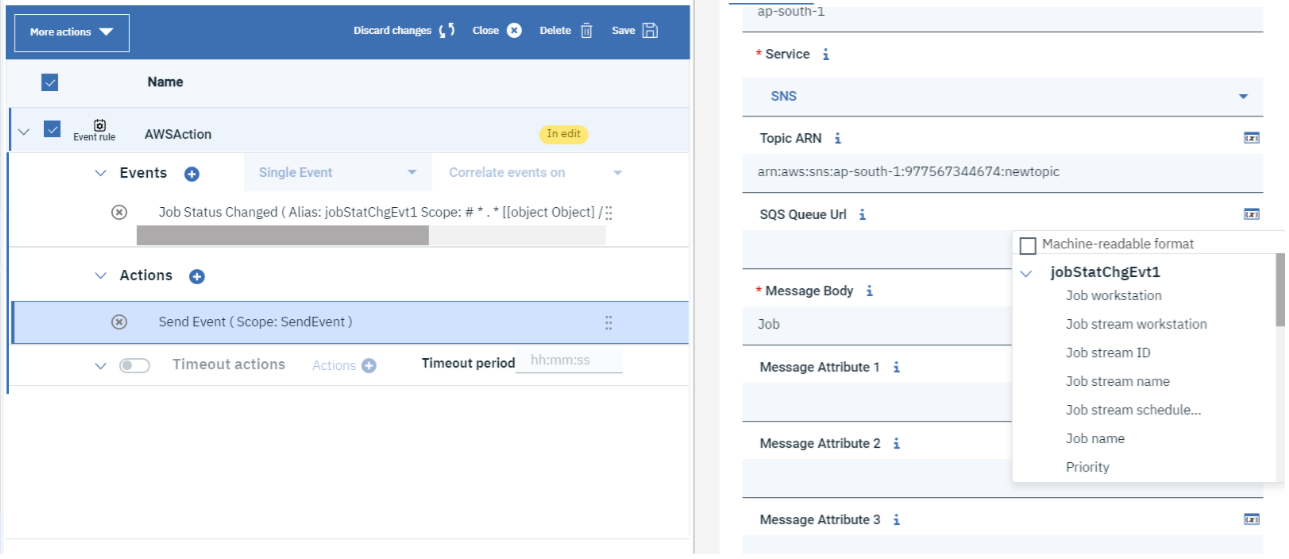 Figure 6: Add Action Page>Properties The event specific information is available to actions in the form of variables as mentioned in the above picture. It will be useful to add more accurate information about the events. Save the event rule after filling all the required information of the action. Monitoring actions This page will give the status of the event rule. 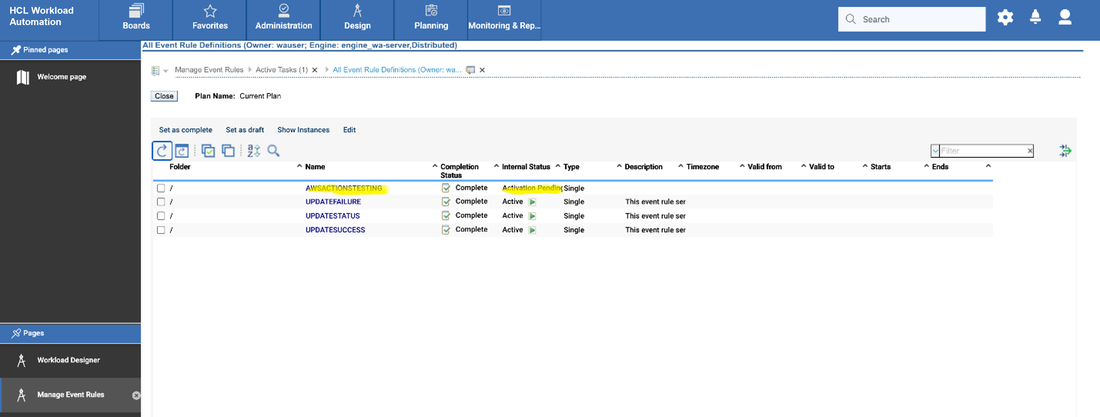 Figure 7: Monitor Page Once the changes are deployed into master domain manager the status will change to active. 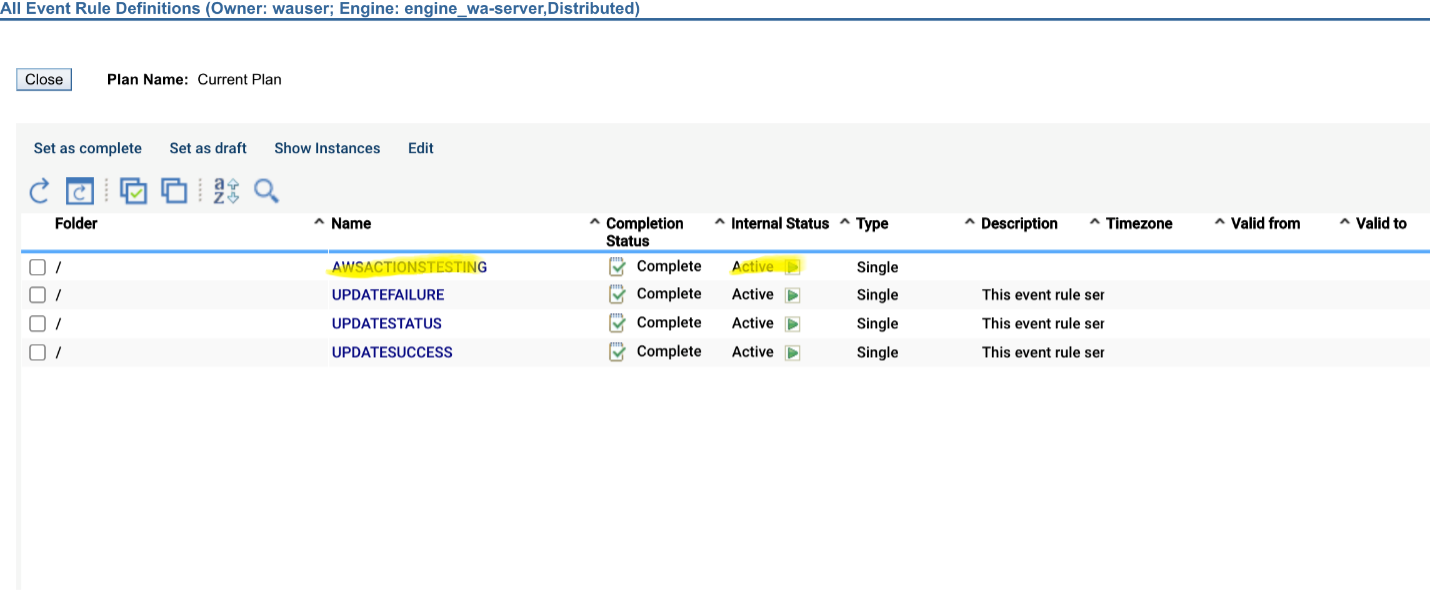 Figure 8: Monitor Page>Status Managing event rules The Monitoring Triggered Actions page displays the information about the triggered action like success or failure and other information.  Figure 9: Monitor Triggered Action Page 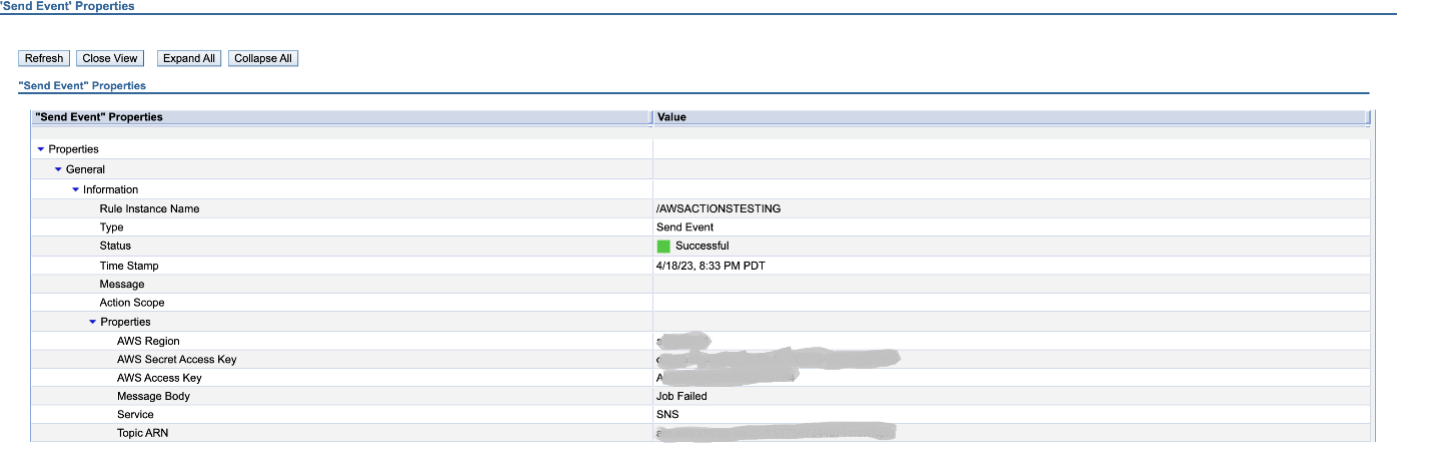 Figure 10: Create Issue Page>Properties Authors Bio
0 Comments
Your comment will be posted after it is approved.
Leave a Reply. |
Archives
July 2024
Categories
All
|


 RSS Feed